
These are the lecture notes for FAU’s YouTube Lecture “Medical Engineering“. This is a full transcript of the lecture video & matching slides. We hope, you enjoy this as much as the videos. Of course, this transcript was created with deep learning techniques largely automatically and only minor manual modifications were performed. Try it yourself! If you spot mistakes, please let us know!
Welcome back everybody to Medical Engineering. Today we want to talk a little bit about X-rays and in particular, we want to talk about all the features of X-rays how they have been discovered. Then we want to figure out how to actually generate them and in the later videos, we want to see how they interact with the matter and then finally also see how the actual image is formed in. In today’s video, we will start and we will introduce the X-ray radiations and how they have been discovered, and how to actually generate them. So looking forward to exploring a little bit of X-ray physics with you.

Now what we will look at today. So we will start with the history of X-rays and then we want to talk about the generation of X-rays and then continue and look into a couple of more details of X-rays in the following videos.

So let’s start with the discovery the X-rays have been discovered actually by Wilhelm Conrad Röntgen on 8th November 1895. Röntgen publishes his paper “Uber eine neue Art von Strahlen” (on a new kind of X-rays) on December 28th. You can see that he was very quick so he discovered the effect in early November and already right after Christmas, he was able to publish the paper. So he got really excited as he discovered the X-rays because they were really different and you could suddenly see things that you couldn’t see before. As you may know, Röntgen also received the Nobel prize for this discovery. Röntgen actually donated his discovery to the entire world and he never published a patent or something like this. So you can see then shortly after the discovery of X-rays there are actually three big companies emerging and they are today still part of the three big medical imaging companies that you may be aware of. So these inventions sparked companies that then fused over the years with other companies but they are now fundamental parts of general electric Siemens Healthineers as well as Philips. So quite interesting if you’re interested in the entire story I can recommend having a look into the book and there you will see how the X-rays were discovered. There’s also a notion on the image that you see here on the right-hand side. There are actually two images that have been created very early and sometimes they get confused. So there is the original image that you see here on the right-hand side where Röntgen actually image the hand of his wife. You can see here that you see very well on the image the bones inside the hand and you can also see the ring. There’s also a much sharper image that then was created in a live demonstration and this is the hand of Mr. Kulik and this image is much sharper and you can see that it is very similar because Kulik also wears a ring and sometimes the two images get confused. So if you’re interested in the whole story about the confusion of these different images this is also inside the textbook. So I really recommend having a look at that. So we have a lot of supplementary material in the book much more than we can cover here in this short video.
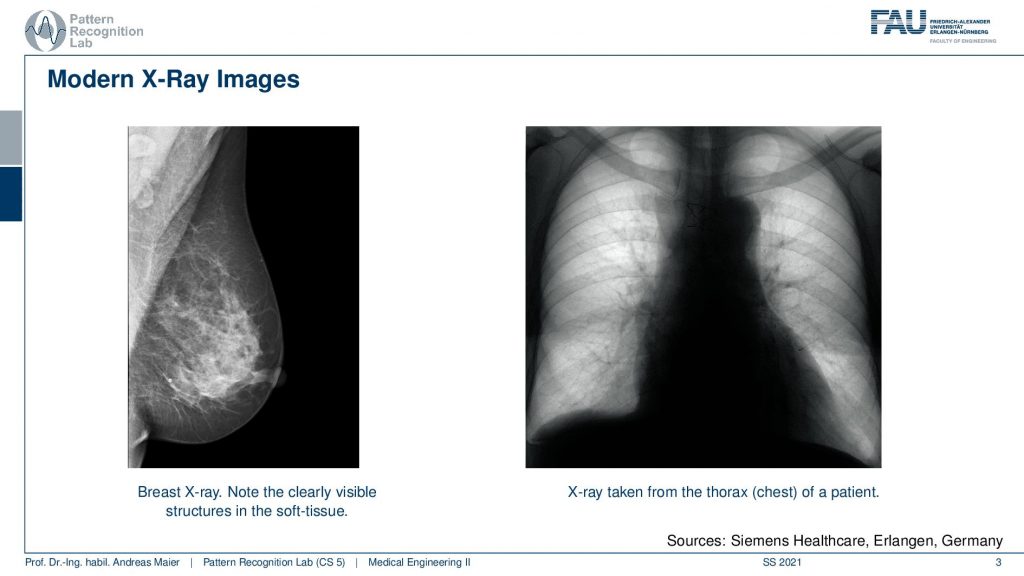
Now, what are X-rays being used for? X-rays are being used quite frequently. For example here on the right-hand side, you see a lung image and this is a typical chest X-ray that is taken in order to find problems in the lung tumors or any bleedings or you can also use it to diagnose the breast. On the left-hand side, you see a rest X-ray image that is being used in order also to spot tumors. So a very common technique to look inside the body and what’s really surprising and magnificent about the technology, it’s not just that you can image with light but you can also see through the body and you can see stuff that’s inside of the body and this was a huge discovery and people got very very excited about that.
So what’s actually the X-ray phenomenon?
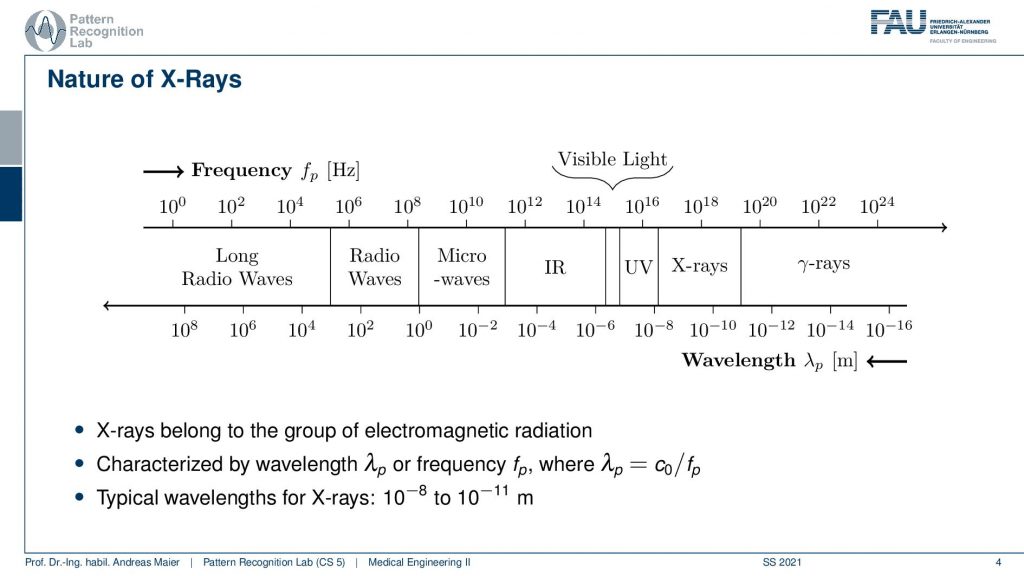
Well, X-rays are a kind of very hard light. So here you see the electromagnetic spectrum from long radio waves over radio waves to microwaves. So you see in this regime you have the MR imaging taking place. Then there is infrared visible light the things that we can perceive with our eyes but as well with endoscopes and you see that we also use them in microscopes as well. Then we see that there is ultraviolet light. so this is already a high-energy light and if we go further down this road we get more energetic radiation. This is X-rays and then if you go even beyond that then there are gamma rays. So you see that the wavelength is actually shortening and there with the frequency is of course increased. On the other hand with the decreasing wavelength, you also have an increase in energy. So X-rays are a kind of electromagnetic radiation but it has a very short wavelength.
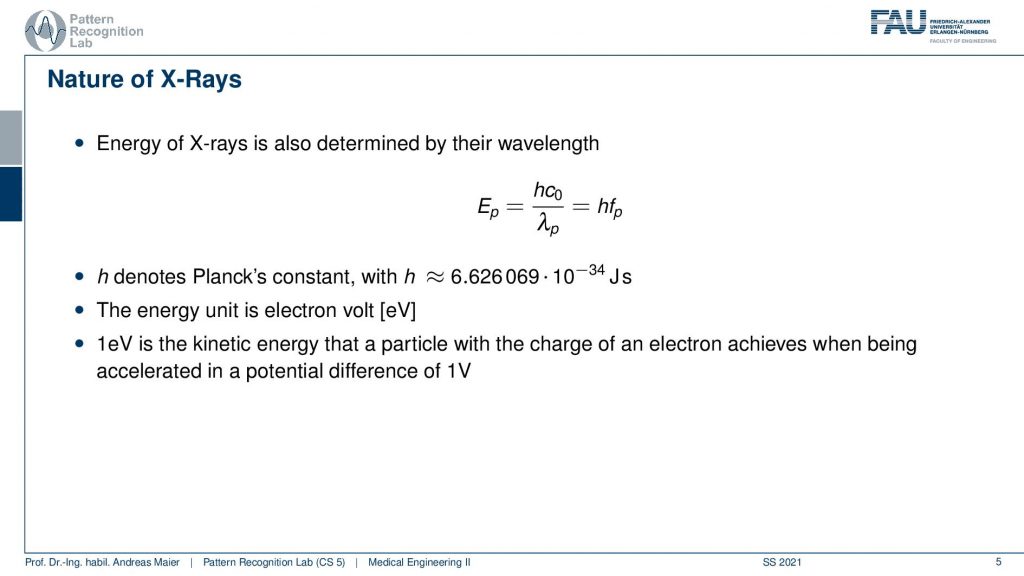
So it has very high energy and typical wavelengths for X-rays are 10-8 to 10-11 meters. So of course the energy is related to the frequency of the light and you can actually convert this if you know Planck’s constant. So you see here Planck’s constant times the propagation speed c0 and you divide that over the wavelength with that you can determine the energy. A typical unit to measure. X-rays are the electron volt. So this is how you typically describe how strong a specific X-ray is and it describes the energy of that particular X-ray. So one electron volt is the kinetic energy of a particle with the charge of one electron that is achieved when accelerated with a potential difference of one volt. So we’ll see that this is very important when we generate actually the X-rays and why we choose that particular unit. For now, just remember this is an energy and it’s related to charge and acceleration voltage.
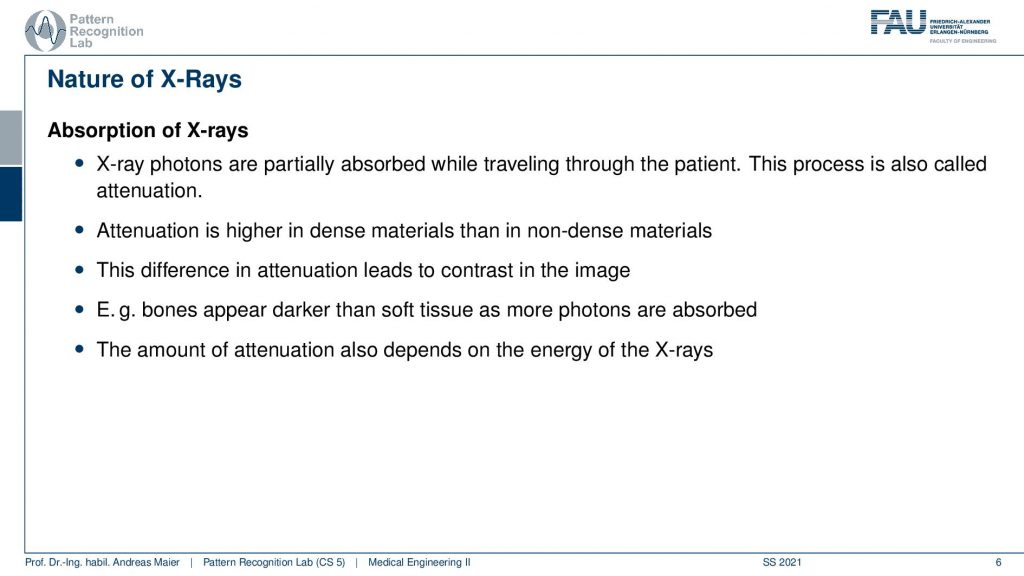
Now X-rays are also being absorbed inside of the body and the actual signal that we observe is that we emit X-rays and they get absorbed somewhere in the body. The difference between the illuminated pixels that did not receive any hard objects that would absorb the X-rays and the actual pixels that have been absorbed is the contrast that we see. So the harder or, the denser material is the higher. the contrast will be in an X-ray image. Also, note that you essentially perceive a superposition of all of the objects along the ray. So what you’re effectively measuring with an X-ray is accumulation. You could say something similar to a sum of all of the objects along the path. It’s slightly more difficult but we’ll see that in a bit. But for the time being, you can imagine that you essentially see a sum of everything that is along the path and we will be able to describe that also in terms of physics in a couple of slides. So you can see that dense objects are visible very well and this is also the reason why bones then appear darker than soft tissues because they simply absorb more photons. Then the amount of attenuation is not just determined by the material but also depends on the energy of the X-rays. So the more energy your X-rays have the more easily. they will penetrate different materials. This is also something that we will talk about when we discuss the interaction of photons with matter in the next video.
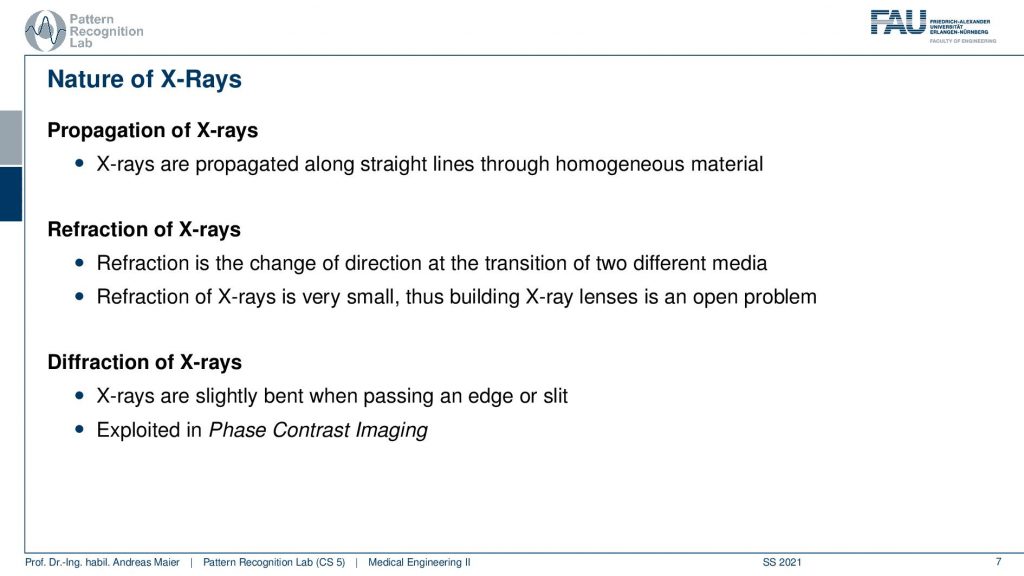
Well, there is a couple of things that are interesting about X-rays. So they generally propagate from the source to the detector and they can be assumed to be more or less moving along straight lines. So, in the homogeneous materials, you can say an X-ray will just go through the material and then there is a couple of effects that can happen with the X-ray. But generally, if no such effect is happening the X-ray is just flying through the object and nothing big will happen. There is refraction which is essentially happening at the boundary of two different kinds of media and you see refraction has been a huge thing in optics because it allows us to understand lenses. So the visible light is then refracted on the surface of lenses and this allows us to work with magnification and so on. In X-rays, the refraction is very small. So our X-rays like to just go through the materials in different media without undergoing through big refraction. This is also one of the reasons why it’s very challenging to build X-ray lenses. But there are other techniques that you can use to increase the magnification and this can be done for example with geometry. We will have a couple of examples when we talk about image formation. Now there’s also an effect that’s called diffraction. Diffraction is happening if your X-ray is being bent when it passes through a slit or an edge. This is then the so-called diffraction effect and diffraction enables us to perform so-called phase-contrast imaging. We’ll have a dedicated video about phase contrast imaging and dark-field imaging using X-rays and there we will talk about slits and diffraction patterns and so on. But this is something that we’ll talk about towards the very end when we already explored the X-rays and when we explored the different ways of using the X-rays. So something to come later. But I think it’s a very important point that you also understand the diffraction of X-rays.
Now let’s start at the very beginning and the very beginning is the generation.
Now, what did Röntgen actually discover?
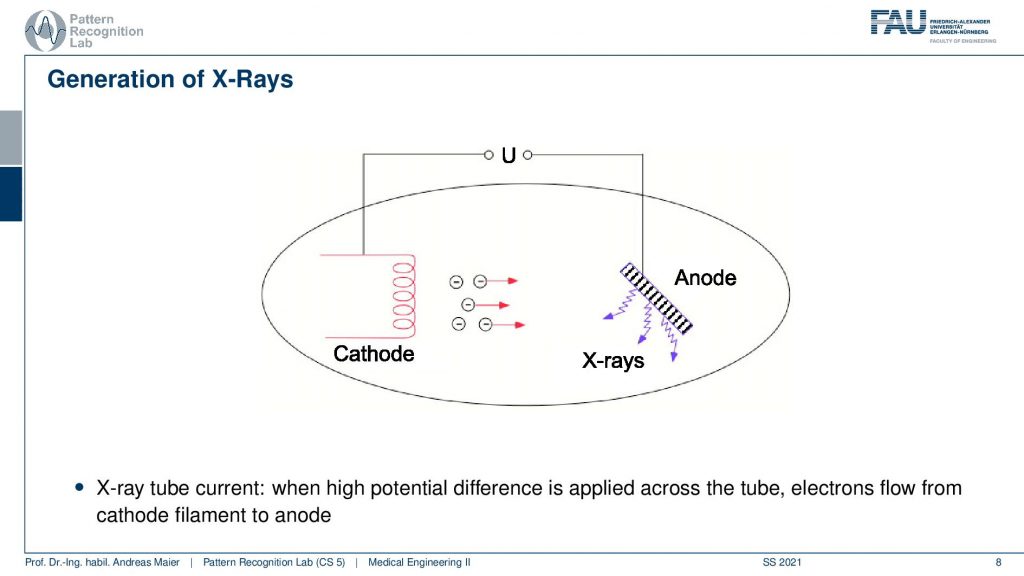
So he discovered that when he applies a voltage to a kind of vacuum tube where he has an anode and a cathode what then happens is that there is some strange radiation that is being emitted. What he actually found is that this radiation is essentially darkening photo plates. So there are plates that you can also use in photography and they react with light and what happened is that Röntgen discovered that although he can’t see any of the light there is some effect happening on this photo plate. So this is essentially a kind of chemical compound that then reacts if there is some light coming in and it darkens. So this is a very early technique of photography actually. So what Röntgen did is he had these photo plates and he was trying to generate light with higher energies and then he discovered that although he shielded the light away using cardboard he could still find that his photo plate was darkened. So some kind of radiation arrived there. Then he got really thrilled and found this a very strange effect and he was using rather high acceleration voltages in order to generate this effect. This is why in the beginning he called it X-rays because this kind of x-radiation was miraculous to him and he didn’t understand it. Then he found that it’s associated with high acceleration voltages and this generates some kind of well high energetic radiation and the radiation is able to penetrate the cardboard. Then through his studies and his experiments, he later figured out that he could also go through denser materials and this is then how this actual image of the hand was generated. He figured out that this kind of radiation is being absorbed in particular objects. Obviously, he didn’t know about cancer risks and that X-rays are radiation that has also the risk of breaking down the DNA inside your body and these kinds of exposures he didn’t know about. So Röntgen found that this is really an exciting technique and it allows one to look inside the body. What he did is he used this vacuum kind of tube applied a high voltage and what happens now is that from the cathode the electrons are being taken out. So they get accelerated and then they hit the anode. So when the electron that leaves the cathode hits the anode, it’s converted into electromagnetic radiation. This electromagnetic radiation is actually the X-rays and now you see why we’re measuring the energy in electron volts. Because we essentially accelerate one electron and this electron then hits the anode and when hitting the anode it gets converted into electromagnetic radiation. This electromagnetic radiation is then sent into the scene and it gets detected hopefully at some detector plate. So this is the schematic and obviously, these things look a little different today.

So typically the cathode is the negative side of the tube and it consists of two principal parts. So there’s the filament and the filament is essentially the part where the electrons then emerge. Then what is also happening typically is that you have these cup housing for the filaments and it has a negative voltage to focus the beam onto a small area. So this is the focusing cap and the filaments and you also find that they have a long axis and the short axis. Often you use that in order to reduce the size of the point where actually the electrons can emerge. So this has also something to do later with the size of the projection of the filament onto the anode material. So if you take the structure then you have some advantages if you want to have only a small spot where they hit.
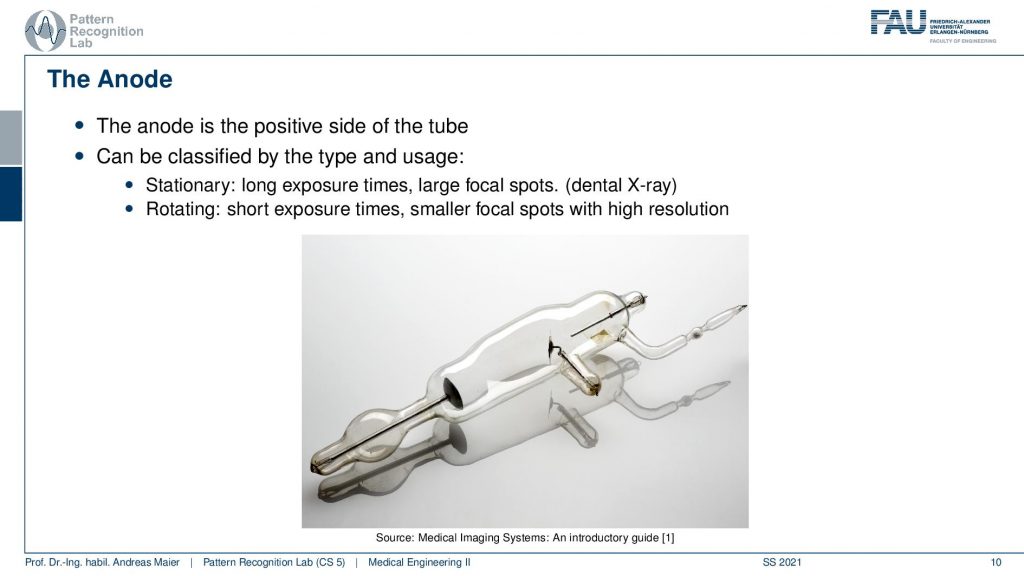
The next thing is the anode. This is an anode that is very similar to the one that Röntgen has been using. So this is essentially the positive side of the tube so where the electrons then hit and there are different types of these anodes. So what you see here in this image is a stationary anode. So here you essentially have a metal plate and often times this is made of some hard material. You also have to make sure that it doesn’t burn down because you have the electrons hitting all the time and the hitting of the electrons actually causes a lot of heat. So you want to have a dense material that is able to take the heat load. Very often this is some material like Tungsten and then this material gets hit with the electrons and from the actual anode dish then the X-rays are generated. What you also do quite often is that you place it at a certain angle just that you make sure that you hit on this side that the X-rays then emerge into a particular direction with a higher likelihood. So this is also done in order to make sure that most of the generated X-rays actually then go into the scene and not too much heat is generated. Well, heat is a problem which is the reason why there are also the so-called rotating anodes and these are being used in order to get away with the heat load. So you have a rotating anode and it essentially also has a certain shape, a circular shape, and then the electrons always hit onto a different position, and by the rotation, you allow the anode actually to cool down. When you receive again after 360 degrees on the other side then the anode has already cooled down a little bit. This way you can just generate more photons at a time and it allows us to build much stronger X-ray tubes.
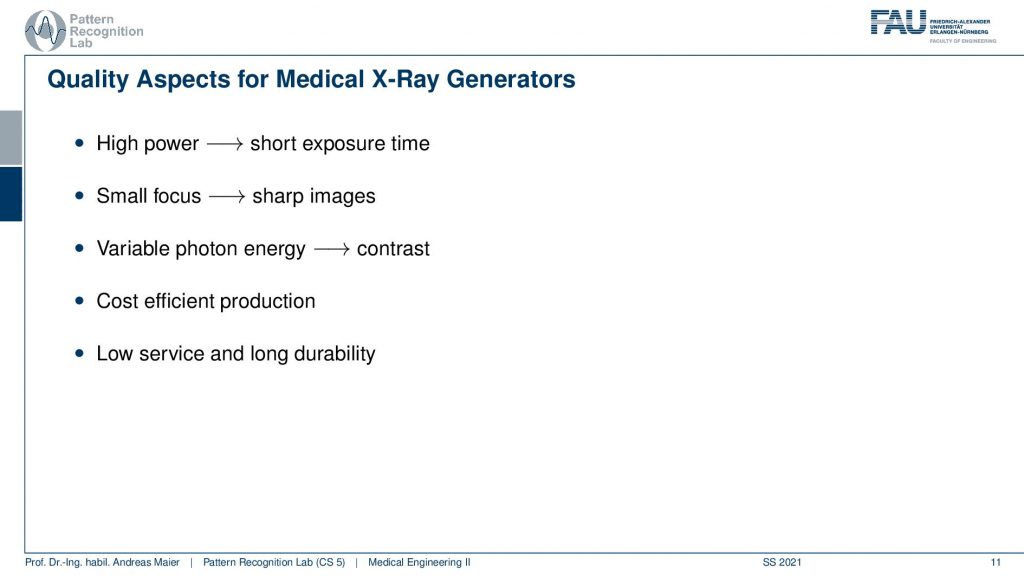
So what is typically a trade-off is that if you have high power you have short exposure times. So high power means many photons are generated and this means that you can have also a high frame rate. So you can also make many images per second. But on the other hand, you also want to have a small focus. So you want the location on the anode dish to be very very small because only this way we are able to have a small so-called focal spot and this is the optical center. The small optical spot is really important because otherwise we get blurring and we’ll show that’s in fact actually on the next slide. Then there is also variable photon energy and the photon energy determines the contrast. We see that if they have lower energy they are more likely to be absorbed but then they can also get much better soft-tissue contrast. If they have high energies they’re not as likely to be absorbed and then you only get contrasts in very dense tissues such as bones. So there’s a trade-off of that as well. Then of course you want to have a cost-efficient production for the source and you want them to stay long in service and have long durability. So this is also why there are many different layouts of these X-ray sources that have been explored.
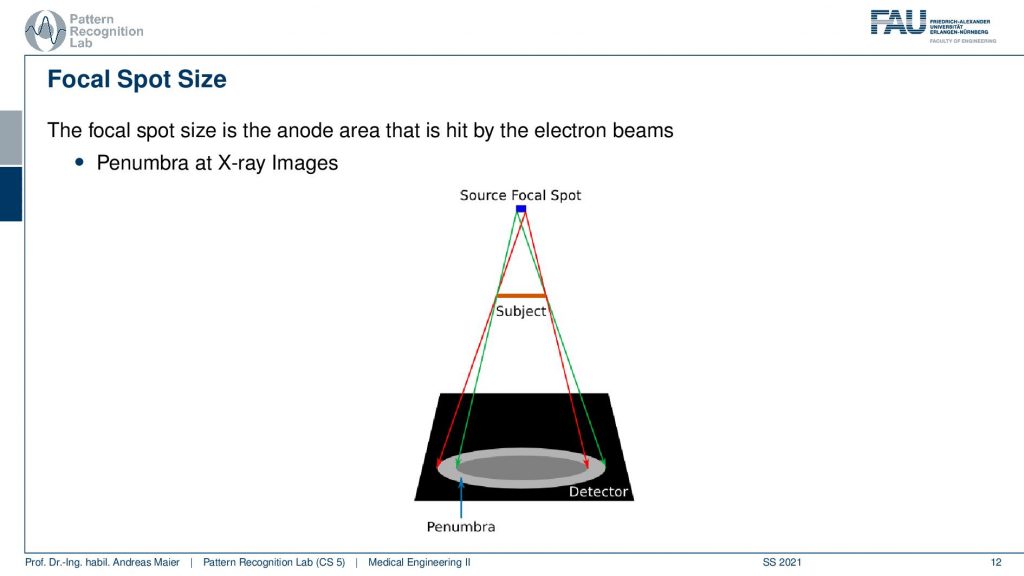
So let’s look at the focal spot size. The focal spot size is important because it inherently introduces a kind of a blur. I can show you this here on this slide. So let’s say this is our focal spot. so you see here the green side is the left side that passes left of the subject and right of the subject here and then in red we also have to connect the right side of the focal spot with the subject and the right side of the focal spot with the subject. You see that they hit this object under investigation at a different point and this causes this Penumbra effect. This penumbra effect causes blurring, a loss in spatial resolution. We will see that we can also use this then to derive a formula that allows us to determine the resolution of the system. But this is something that we will introduce when we talk about actually computed tomography and how to get 3D volumes from that. Now if we do that then we can understand that a small focal spot is really important.
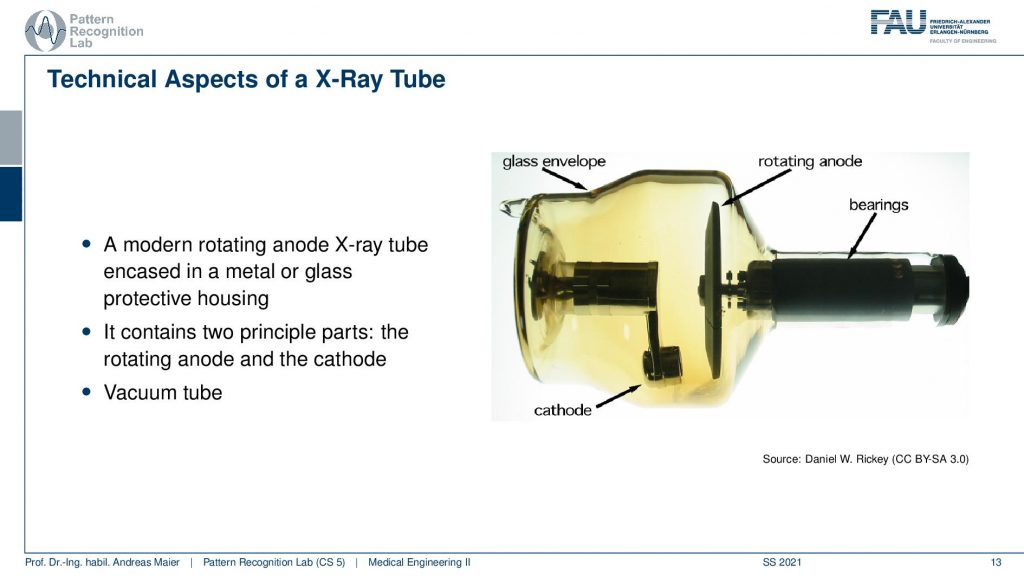
This is one of the main reasons why people have been introducing these kinds of X-ray sources. You see here this also has a vacuum but then you have this rotating anode. So you see this guy here this is the anode disc this is the cathode. Then you can use bearings here in order to rotate the sky and when we then return to the original position we already had some time to cool down the anode and we can inflict much more electrons without melting the material. Obviously, we need this glass envelope because everything is in a vacuum.
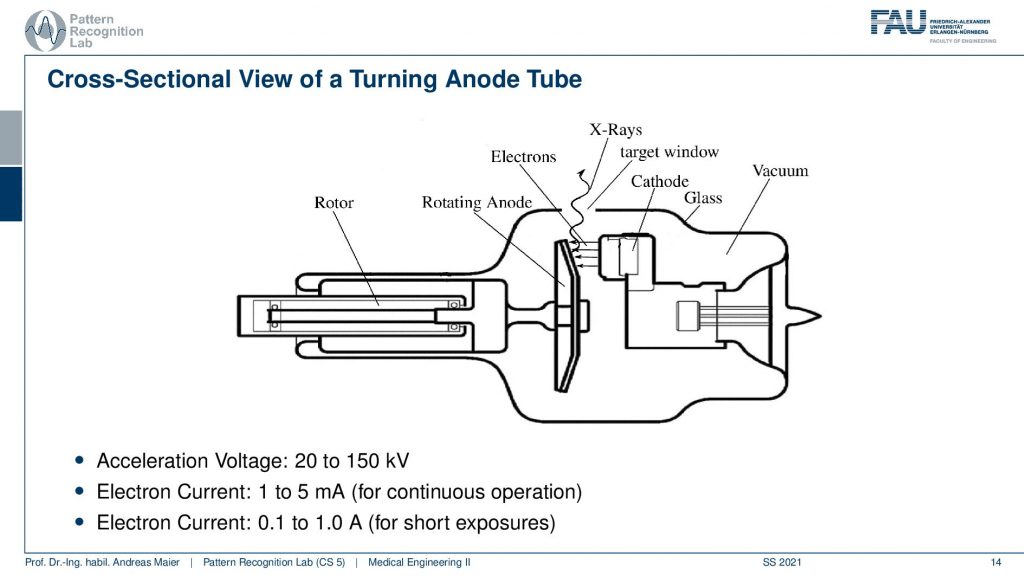
Now let’s have a look at the schematic here and this is now flipped but you still have the rotor here. Then you have the rotating anode here and here you then have the X-rays they are generated here. They are generated because we have some electrons hitting the anode disc from the cathode and this generates our X-rays. So all of this is of course in a vacuum. You may think that there is a hole here in the schematic but this is just for showing that there is a window. Obviously, the X-rays have enough energy to penetrate the glass. So that’s not a huge issue. But what typically is happening is that this entire tube is in a big housing and this housing then has a window here because you want to emit only into one direction and you want to filter out all of the X-rays that would potentially leave the source scattered into these directions. So this is also a very important point here. Then typically we use voltages from 20 to 150 kV. Then we can generate a different number of photons and this is determined essentially by the current. For continuous operation and continuous movement then typically the current is in the range between one to five mA. If you have a pulsed X-ray source that is generating image by image like you would do with a flash of light in the camera, then you have currents from 0.1 to up to 1 A. So this is really short exposure and this allows us for example to take really quick shots. This is also relevant if you have for example motion in the scene. So there you want to have very fast shots because otherwise, you introduce additional blurring because the patient is breathing for example
So let’s go ahead and talk a bit about the different types of X-rays and this is essentially governed by three regimes that people talk about.
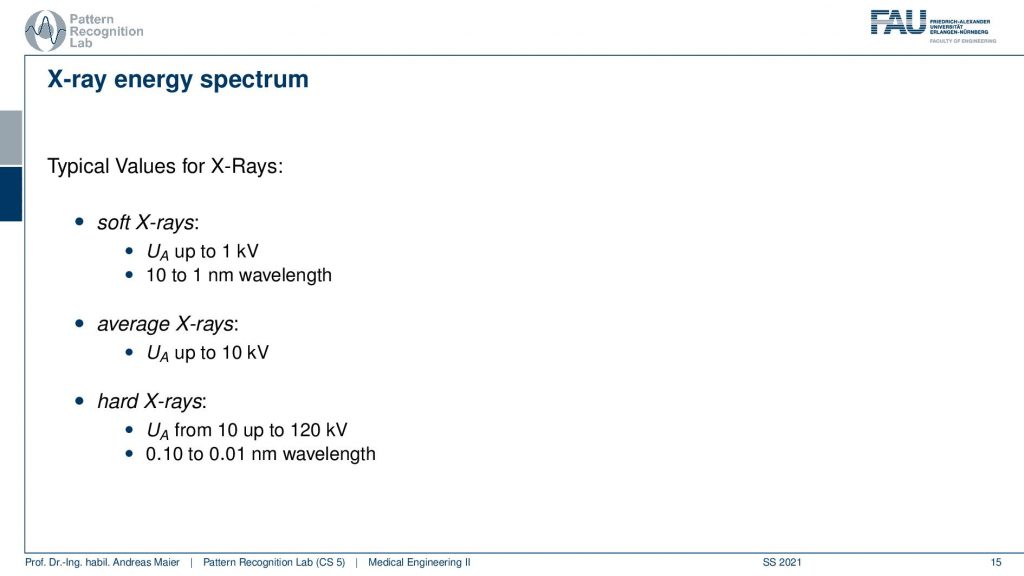
There are soft X-rays where the acceleration voltage UA is up to 1 kV and they have 10 to 1 nm wavelength. Then there are the average X-rays they are up to 10 kV and the hard X-rays range from 10 to 120 kV. The hard X-rays are the ones that we typically use in medical diagnosis and they have wavelengths from 0.1 to 0.01 nm. So this is a very short wavelength and high energy and we need the high energy in under to penetrate the body. You know there’s a couple of centimeters of water and bones in the way and you have to be able to transmit the rays through the entire body in order to get an image on the other side. So this is why you need rather high acceleration voltages.
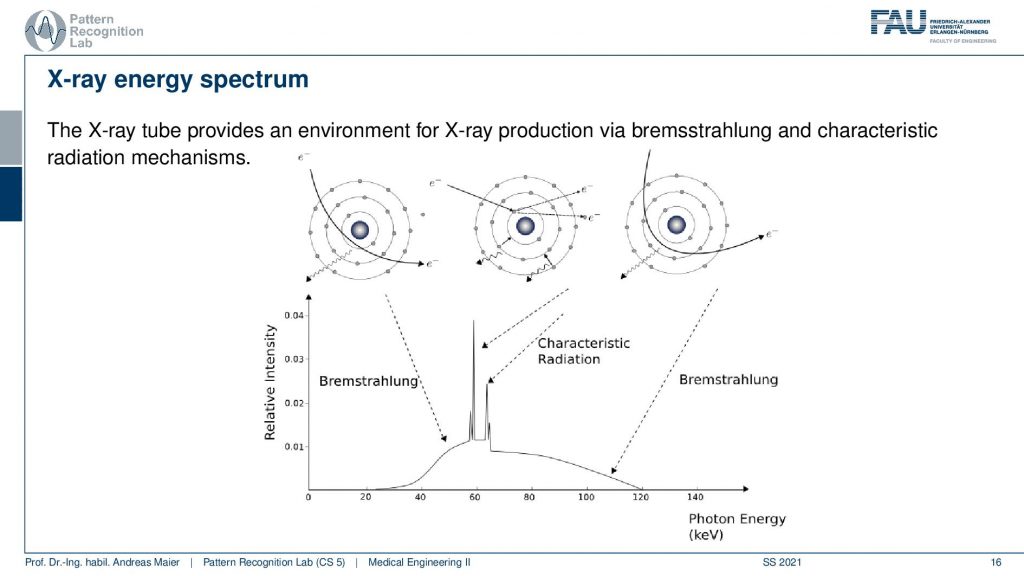
Speaking of that we can now have a look into the X-ray spectrum. So when you generate X-rays you don’t just get X-rays of single energy but they’re essentially distributed over a whole range of energies. So what happens if you accelerate with a certain voltage is that the electrons then hit the anode dish and by hitting the anode. They get converted into X-rays but it’s not like that one electron is typically completely converted into one X-ray. It happens and this is why you can see here on this plot that it has the highest energy. So this is the energy. On the x-axis, you see the energy and on the y-axis, you see a relative intensity or you could also think of a photon count or a kind of histogram. So this is the probability for this X-ray energy to emerge and here we see the X-ray energy. Here you see in red that there is no energy higher than 120 kilo-electron-volts actually appearing and this is of course the energy that is used for acceleration. So if I accelerate with 120 kilovolts and I have one electron, the entire energy can be converted into a single X-ray and that would be an X-ray with 120 kilo-electron-volts. Now you can see here that this actually doesn’t appear that frequently. What actually happens is that you have a whole kind of spectrum. So you see that we have this white body here that I’m indicating here in purple and this is called Bremsstrahlung. So this is the radiation that is generated when the electrons get decelerated. So what’s happening is that the electron essentially penetrates the material of the anode and then it gets slowed down and during the slowing down an X-ray is generated. What can also happen is that it’s not just slowing down. So this is another case where it’s slowing down more because it’s bending more. So here we lose more energy and in this case, we generate something that has higher energy. In this case, we generate something that has lower energy. Now there are these strange peaks here. You can see those guys here. These distinct peaks are happening here and this is the characteristic radiation and the characteristic radiation is dependent on the anode material. So what happens, in this case, is that the electron hits an electron that is in the shell of the atom that is the material of the anode. If we hit that then we actually get a kind of ionization. So we kick out this electron and then the ionization causes another electron to fall onto the shell here. The distances between the shells have a distinct energy and you can see now if this kind of effect happens this electron can still continue. So it can continue to cause more Bremsstrahlung. But you will see that it kicks out one of these electrons and therefore it creates a distinct kind of peak a distinct kind of energy. Exactly the energy when from the higher shell the electron falls to the lower shell. This also generates some X-rays these kinds of X-rays that are generated here and this is exactly this kind of radiation and actually, when you count the number of peaks here you can figure out how many shells you actually have. So we will look at that in one of the next slides actually.
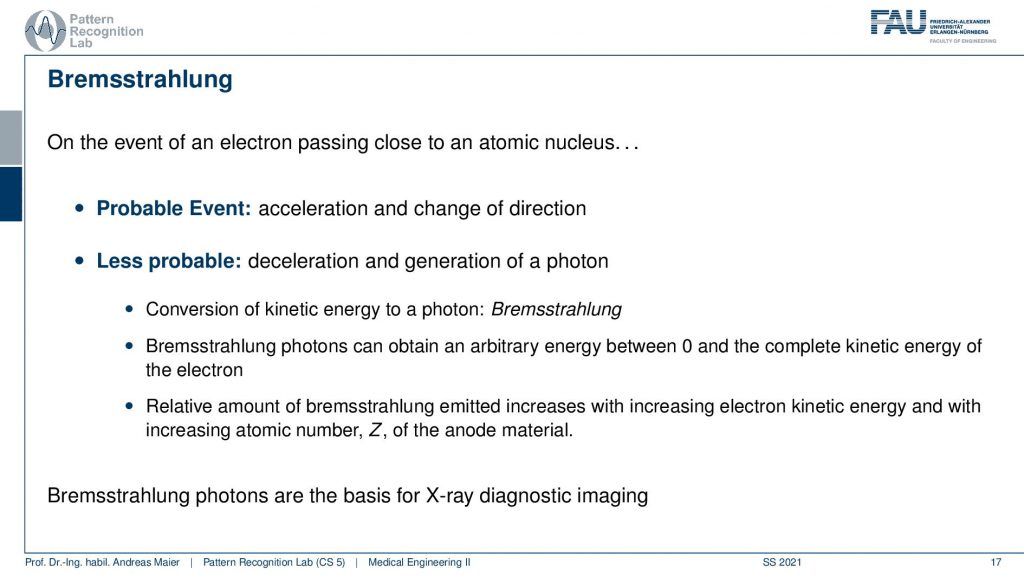
So what happens with the Bremsstrahlung? Well in the Bremsstrahlung, this is something that happens quite frequently. The electron changes the direction and then it loses energy and this is a probable event. So having the electron just enter the anode material and changing the direction is very probable. But what happens in a less probable case is that the conversion of the kinetic energy then also causes a photon to be generated. So in this probable event here we are actually generating heat. So this just warms up the material. But in this case, here we are generating Bremsstrahlung. So there the electron enters the field of the atom in a way that generates some additional X-rays and this is what generates the Bremsstrahlung. So Bremsstrahlung is the basis for the X-ray generation and most of the photons that are generated emerge from Bremsstrahlung. Then there is also this other effect.
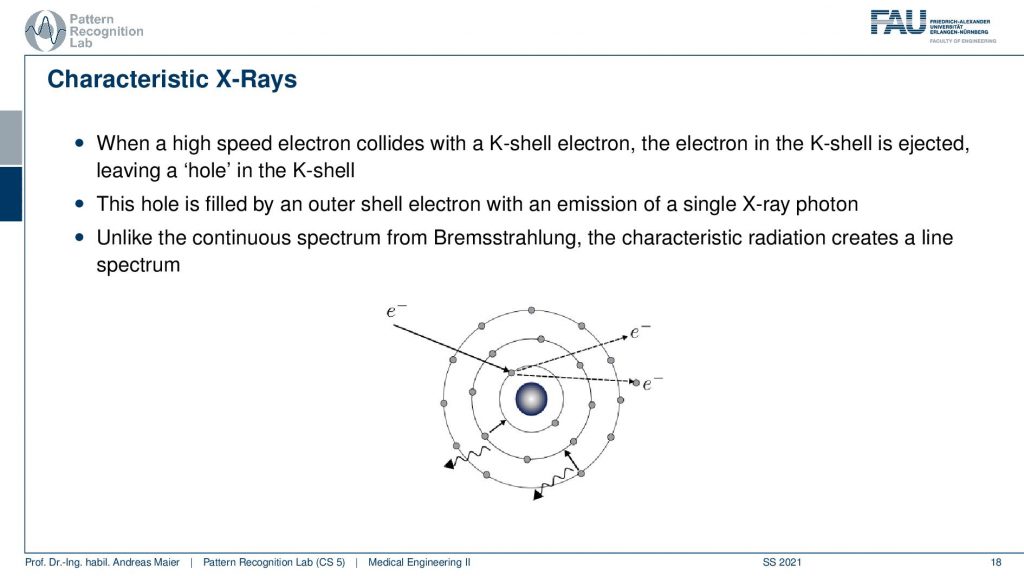
These are the characteristic X-rays. This is exactly when you hit here one electron the electron continues but this one has ionized away and just goes somewhere else. This then causes exactly one of those electrons to fall down here and because then we are missing one electron here we also have another electron from the outer shell falling in here. So this is where you see these associated peaks and the energy of those photons here has a specific value and this is exactly the distance that is essentially generated by falling down into the particular shell. This is characteristic of the material.
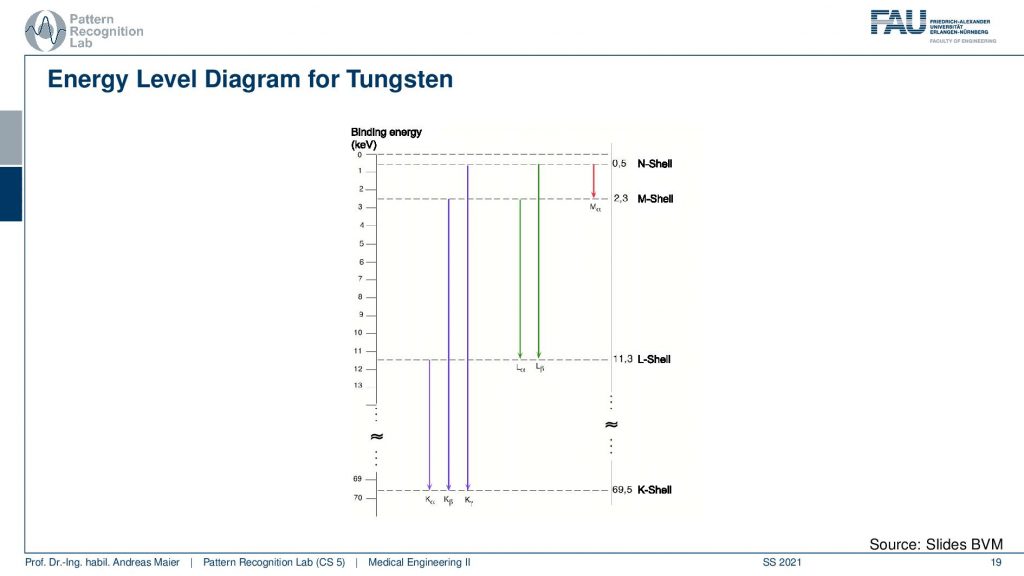
So here you see the energy levels for Tungsten. I’m choosing Tungsten here because this is a very popular material for anodes. Here you can see that we have an N-shell, M-shell, L-shell, and K-shell and the different electron configurations. Then what happens is if we kick out one of the electrons on this shell you might know we have something falling down from the M-shell or from the N-shell directly or it could be falling down from the L-shell. If something falls down from the L-shell then you have an additional kind of falling down here. You see that there are also two possibilities and if the one from the M-shell to the L-shell is happening you still need one N-shell electron falling down to the M-shell. Well, you might have heard about this already in physics and this is a very typical effect that happens when you ionize materials.
Now, this brings us to understanding the X-ray spectrum. So we have these two kinds of effects that generate the X-rays: the characteristic ones and the Bremsstrahlung one.
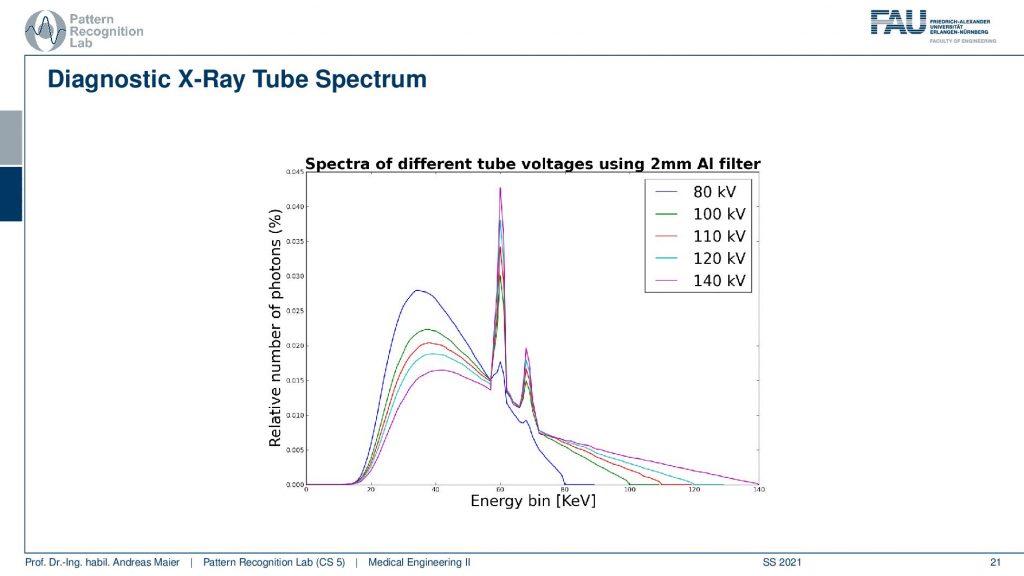
Then this allows us also to understand the spectra of different energies. You can see that here. You can immediately see that blue here is this information and it has 80 kV and this means that the highest photon energy that can appear is actually 80 KeV. Of course, we can now also find that our purple spectrum here is associated with this guy. here because the energy can only be converted into a single photon. This photon is generated when we convert all of the energy of the electron into one photon in one go. So what you see here as well is that if you have spectra with lower acceleration voltage like the blue one here you can see that we have this peak in the Bremsstrahlung. So we generate more of the softer X-rays. If we have high acceleration voltages you can see that we have more of the higher energetic X-rays. There’s a certain overlap and actually, there is a filter in here. So there are two millimeters of aluminum in the beam path which then causes the very soft photons to disappear and this is actually something that we want to do. Because of the soft X-rays, they will be absorbed very quickly in the tissue and you want to filter them out because if all of them gets absorbed anyway you won’t be able to see them in the image contrast. So you want to take away the low energies such that you have already photons that are likely to go through the entire body. Actually, this isn’t ideal anyway. So what we would like to see in the ideal case is of course a spectrum that only has single energy. This is actually what is a basic assumption in computer tomography. But you see already here that this is not very realistic. So we would like to have spectra like this one where we only have single energy. We could do that by filtering but then we lose a lot of photons and this means we need a lot of energy.
Speaking of energy we can also talk a bit about efficiency.
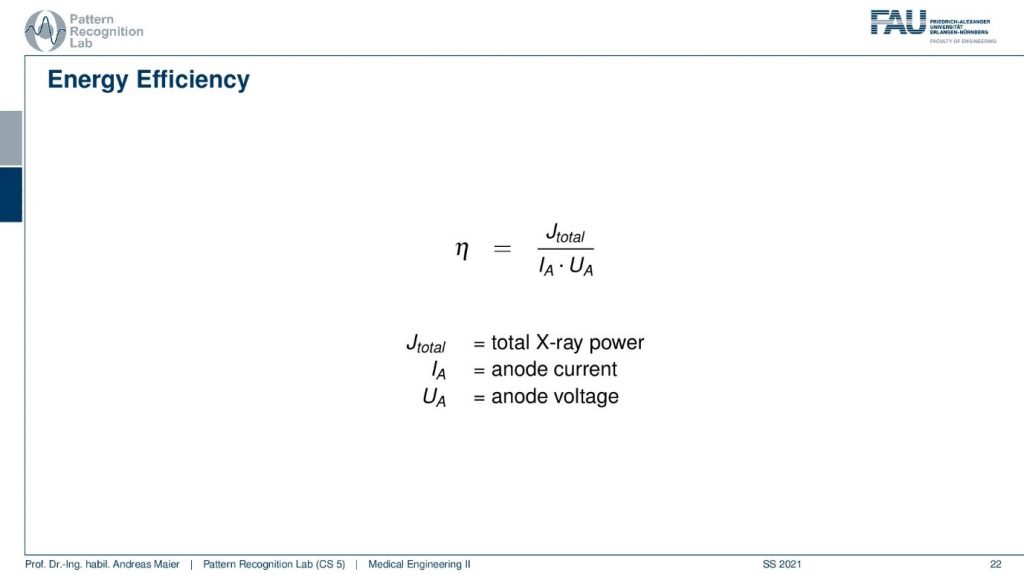
The efficiency can be measured by η and η is essentially the total X-ray power and you divide it by the anode current and anode voltage. So this tells us how much of the energy is actually produced in X-rays and how much power I actually put into the source in order to generate them and you see that this η is actually not that great.
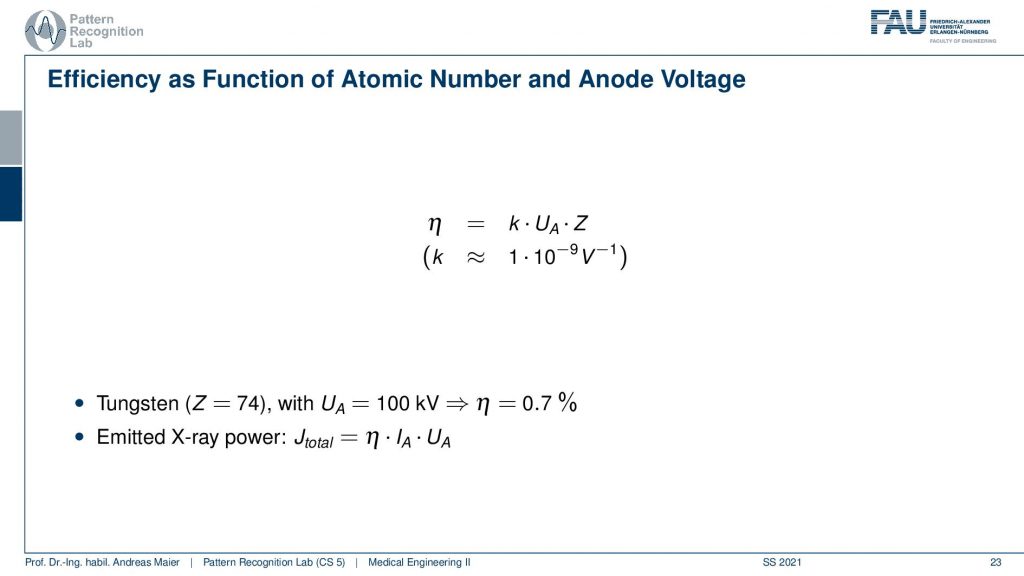
So here is an estimation formula and you can calculate either or estimate either with the constant k here. k is approximately 10-9.1 over volts. If you now know the acceleration voltage and the atomic number of the anode material then you can estimate how efficient actually your source is. You see here in this example that if I have an acceleration voltage and Tungsten I get approximately an η of 0.7%. This means that 99.3% of all the energy is converted into heat. Only 0.7% of the energy is actually producing X-rays. So this is what I meant with the probable event that the electron just generates heat and here you see that less than a percent is actually used to generate the actual X-rays. Then you also understand why there is so much heat generated and why we have to have these sophisticated coolant techniques. So in the total power, of course, you can then determine by multiplying η with the current and the voltage and this will tell you how much you’re actually generating and with this simple formula you can already get estimates of how effective your X-ray generation will be. Now you see heat is really a huge problem and there is a new kind of X-ray source that is being developed right now. There are early prototypes already available. So we actually have one of these special new kinds of tubes already here installed in Erlangen in our experimental physics group and what they use is a very cool principle. They use liquid metal. So you remember that we had the rotating anode and we did that in order to get the energy away. What the liquid metal tubes do is they essentially have an anode that is not rotating or stationary but it’s flowing. So they have a nozzle. You can see a schematic of a nozzle. So it’s very thin and then they have a stream of liquid metal and you of course have to have a laminar flow here. This then is taken up in a basin. You probably want to rotate this in this direction here because then the flow is going down and not to the right-hand side and then what you do is you use this entire stream of liquid metal as the anode. Obviously now I can produce a lot more photons because I got rid of I can generate essentially an infinitely long kind of anode disc because I can essentially have a reservoir of the liquid metal that then goes here and I pump it up again here and depending on the size of this reservoir I essentially determine the length of the rotating anode. Remember that all of this has to happen in a vacuum. Now the electrons would essentially hit the stream of liquid metal and this would then generate our new X-rays that would then somewhere leave through a window. You can generate orders of magnitude more photons with this kind of X-ray technology. Now, this is being done in experimental systems right now. You can use that in a stationary setting. So you set up the X-ray tube and then if you want to scan something you place it in front of it and if you want to generate different view angles you actually have to move the object. What you’ll see later is that we also use CT gantries and there we rotate very quickly about the patient and obviously this kind of technology is very difficult because the inertial forces during the rotation would of course change the direction of our flow here. So things would be really complicated to actually install this on a rotating gantry. So current systems here use stationary liquid metal jet X-ray sources. But still, that’s a super cool technology, isn’t it? That you can use liquid metal and then essentially stream it through vacuum and use it as an anode disc in order to generate high amounts of X-ray photons. It’s really cool!!! And we are actually using this for generating really highly resolved X-ray images and this kind of technology may be a game-changer for X-ray microscopy. So it’s a really cool technology and we think that we have a lot of benefits with this kind of technology. Well, we’ll see that this is research but you already see now that the kind of things that we’re doing here in this class. They’re not just a basic introduction. But we also want to show you that everywhere in these modalities it’s not that far actually to go into a research direction. Now, this is a research direction into the actual generation of X-rays. So it’s not like we discovered this more than 100 years ago and still, there are new breakthroughs that are being discovered more than 100 years after the discovery of X-rays. You will also see that when we look then into the developments of CT that there is a continuous trend to improve image quality to use fewer photons and so on in order to get the best image quality possible for the diagnosis.
This brings us already to the end of this video. Now in this video, you understood what actually X-rays are how they have been discovered by Röntgen and how we can generate them. The magic of the X-rays is actually that we are able to penetrate dense tissues and we can see through things we can illuminate a hand and see the bones inside. So this is the magic of the X-rays. So far we only understood how to generate the X-rays and now we want to understand in the next video what’s actually happening when the X-rays then finally hit the body and what kind of interactions they actually do there and how then finally the image is formed. So stay tuned and I hope you enjoyed this video. I’m very much looking forward to seeing you at the next one. Bye-bye!!
If you liked this post, you can find more essays here, more educational material on Machine Learning here, or have a look at our Deep Learning Lecture. I would also appreciate a follow on YouTube, Twitter, Facebook, or LinkedIn in case you want to be informed about more essays, videos, and research in the future. This article is released under the Creative Commons 4.0 Attribution License and can be reprinted and modified if referenced. If you are interested in generating transcripts from video lectures try AutoBlog
References
Maier, A., Steidl, S., Christlein, V., Hornegger, J. Medical Imaging Systems – An Introductory Guide, Springer, Cham, 2018, ISBN 978-3-319-96520-8, Open Access at Springer Link
Video References
- My X-ray swallows https://youtu.be/umnnA50IDIY
- History of X-rays https://youtu.be/fHUzVqoDnts
- My rotating anode X-ray tube first start https://youtu.be/YJ6AZjjQ4cg
- X-ray production animation https://youtu.be/IsaTx5-KLT8
- X-ray Body in Motion – Yoga https://youtu.be/wCu14zMZ_1Y
- Excillum MetalJet https://youtu.be/kPEmtilJdGI