These are the lecture notes for FAU’s YouTube Lecture “Medical Engineering“. This is a full transcript of the lecture video & matching slides. We hope, you enjoy this as much as the videos. Of course, this transcript was created with deep learning techniques largely automatically and only minor manual modifications were performed. Try it yourself! If you spot mistakes, please let us know!
Welcome back to medical engineering so today we want to start talking about modalities and in particular we are interested in endoscopy. So you will see that endoscopy is actually more or less just a camera but with some additional optics such that you can look inside the body. So looking forward to exploring endoscopy with you guys.
Let’s have a look at some of our slides and we’ll start with endoscopy today. So, of course, we want to give a brief overview of the topic and in the first video, we will mainly discuss the current state of the art and the history of endoscopy.

So in the first part, we will start looking into the history of endoscopy. Se will look into the setup of the hardware that we need. Then we will also look into the other appliances that we need in order to make minimally invasive surgery come true. Finally, we will discuss one of the surgeries. In the second part, we will then look essentially into the future of endoscopy and discuss a couple of the advanced ideas.
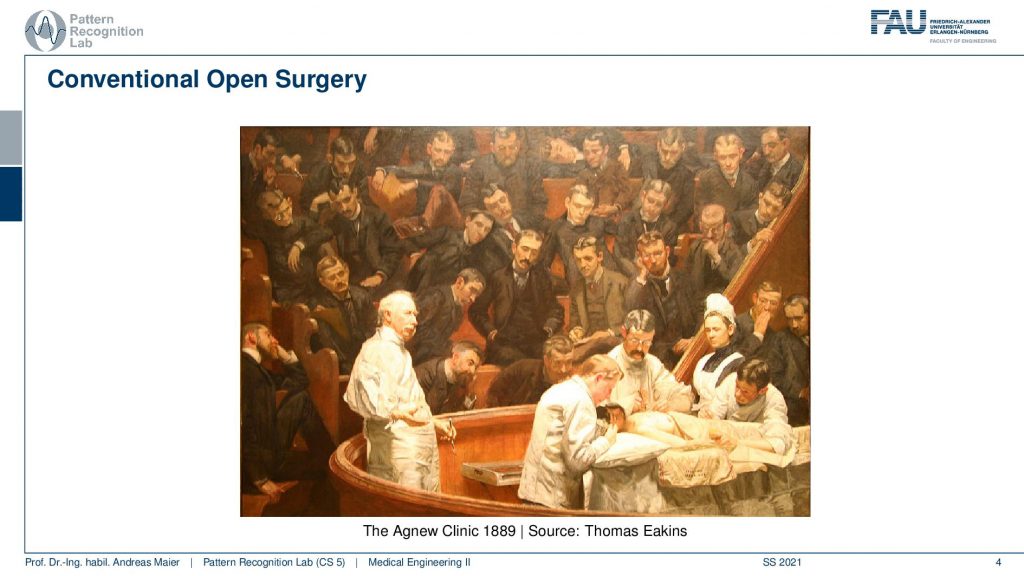
Now let’s start with the history of the endoscopy. One reason why people came up with endoscopy is that they wanted to avoid open surgery. So here you see an example image where you really have to open the body in order to find the site that you want to operate on. So this is kind of very invasive and obviously it would be much more elegant if you could look inside of the body. So this is why endoscopes have been developed. Now the term endoscope actually emerges from Greek “endon” is the “inside” and “skopein” is “to see”.
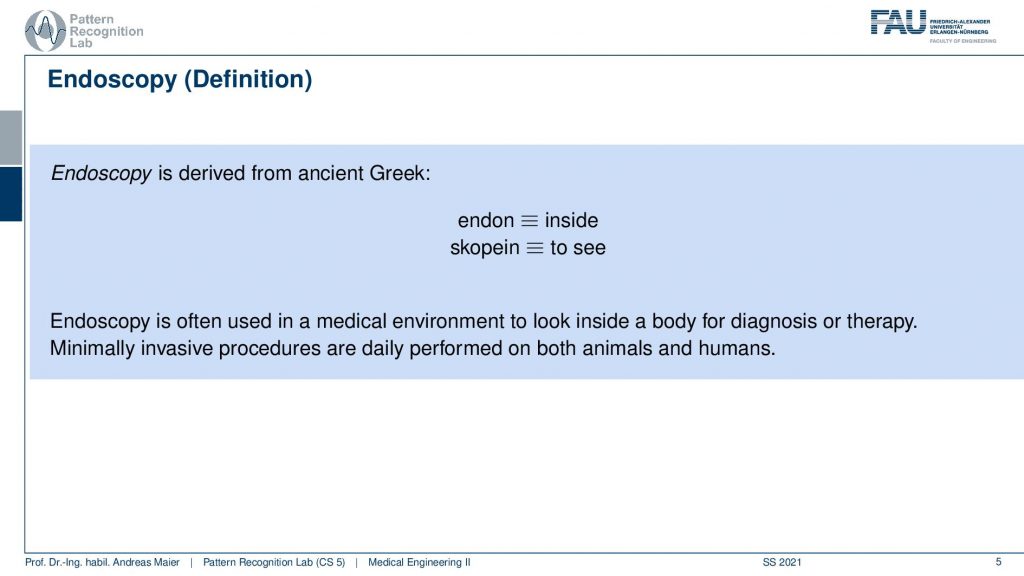
So endoscopy is a device or a technique that allows you to look inside of the body. Typically this is used in a medical environment and you operate on some patients. The technique of endoscopy then gave rise to minimally invasive procedures where you only have very small cuts and you use the entire optics in order to go inside of the body and perform imaging from within the body. So you will see that this is actually a pretty challenging endeavor. But it can be achieved and actually minimally invasive surgeries have brought numerous benefits to patients today.
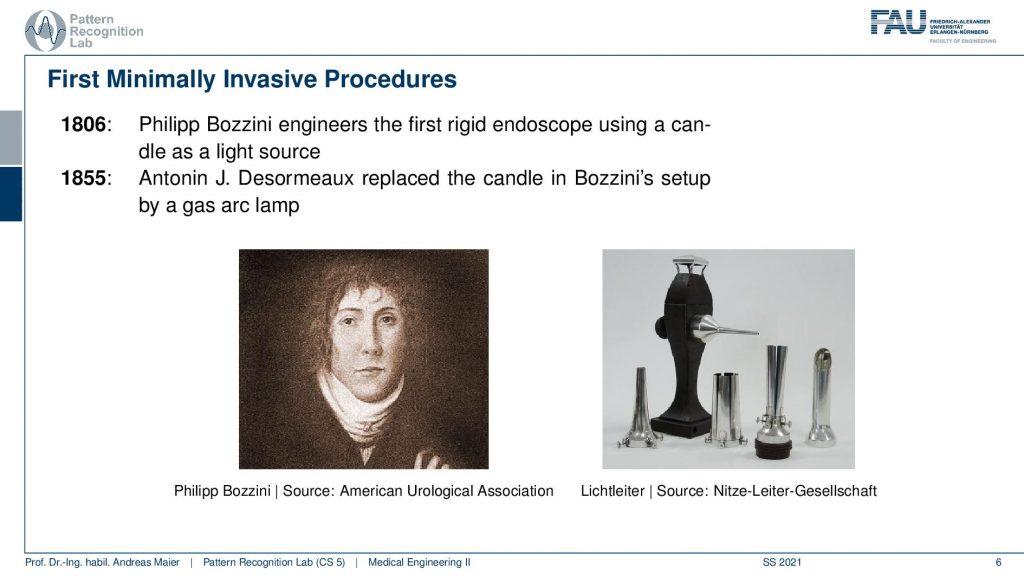
So the first endoscopes were actually produced by Philipp Bozzini. He engineered the first rigid endoscope using a candle as a light source as early as 1806. In 1855 Antonin Desormeauz replaced the candle in Bozzini’s set up with a gas arc lamp. You can see here this is the kind of setup that people have been using. So it’s not that you can look very far like in modern-day endoscopes but you are able to look inside of the body. The key challenge is of course how to get light into the body such that you can see actually something. So you need a rather powerful light source in order to be able to see anything. This then gave rise to more complex endoscopes and already in 1912 Hans Christian Jacobaeus used an endoscope to perform an intervention to explore the abdomen and the thorax.
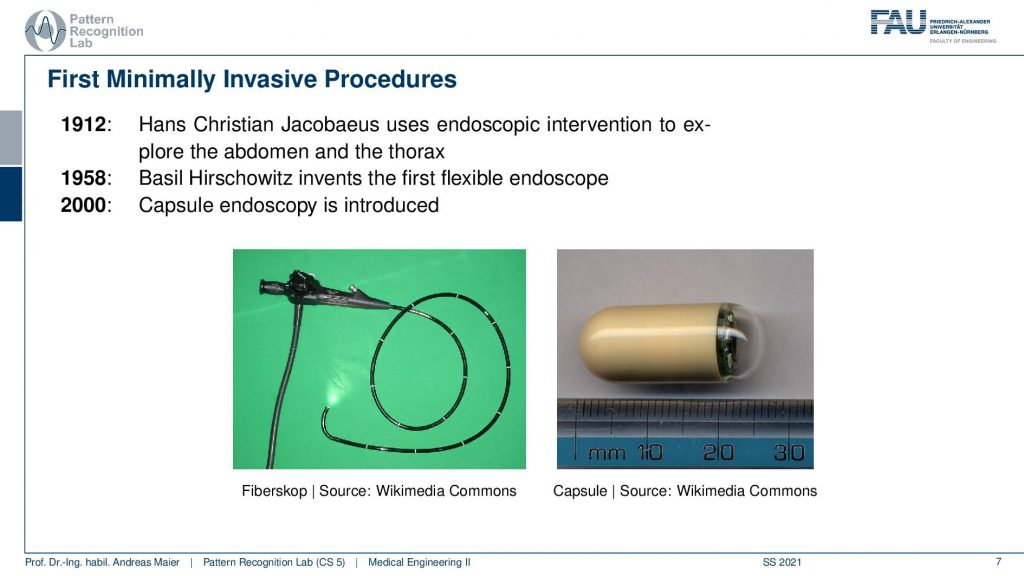
In 1958 Basil Hirschowitz invented the first flexible endoscope that you can see here on the bottom left. So this has flexible optics that can actually be bent using glass fibers. With those fibers, you’re able to transport the light into the body and image and return the light such that you can see it from the outside. Modern developments then also yielded new technology like the capsule endoscope. It is a kind of endoscope where the camera and a receive and transmit unit is mounted onto a tiny capsule that can be swallowed. So this then essentially gets rid of all the optics that you need in order to get the light inside and outside again. You can swallow the capsule and then it would essentially go through your gastrointestinal tract and you would be able to image from the inside without any hardwired connections. Everything can be transmitted wirelessly. So this is a very interesting development, yet the capsule endoscopes still face a couple of challenges. For example- you don’t want these capsules to get lost. So you have to be very careful with administering them and people are also exploring magnetically guiding those capsules through the body such that you can also image in the right direction. So this is a very exciting field of research but we won’t cover this topic in our class today. But of course, I can encourage you to have a look at the literature and to read about these exciting developments in endoscopy.
So let’s continue a bit and look into the setup.
The setup is actually a camera. So first if we want to understand endoscopes we have to understand how a camera works. I have the so-called pinhole camera model here for you.
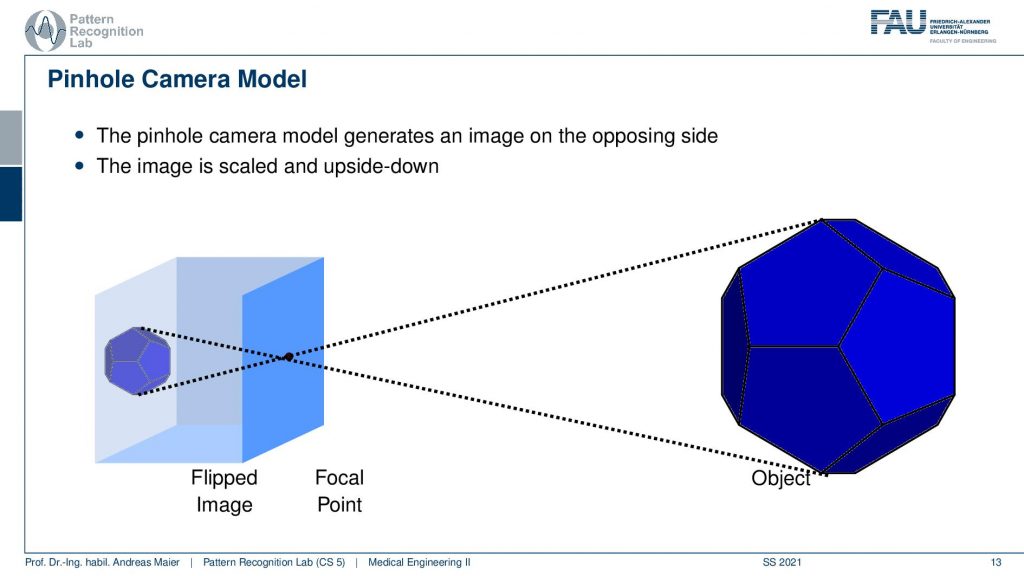
You can see that how it actually works is that you have some object this object is then projected into the camera. It’s a small chamber this is also where the term camera actually comes from and inside you can then image the light. This could be for example a photo-sensitive plate-like in the very old cameras or a CCD chip that is able to digitize directly the incoming light and perform imaging. Now you see in this setup you create a copy of the outside world the projection. But it’s upside down and this makes things a little more complicated. This is why in the following we will not work directly with the pinhole camera model as shown here. But we will switch to a version that looks like this one.
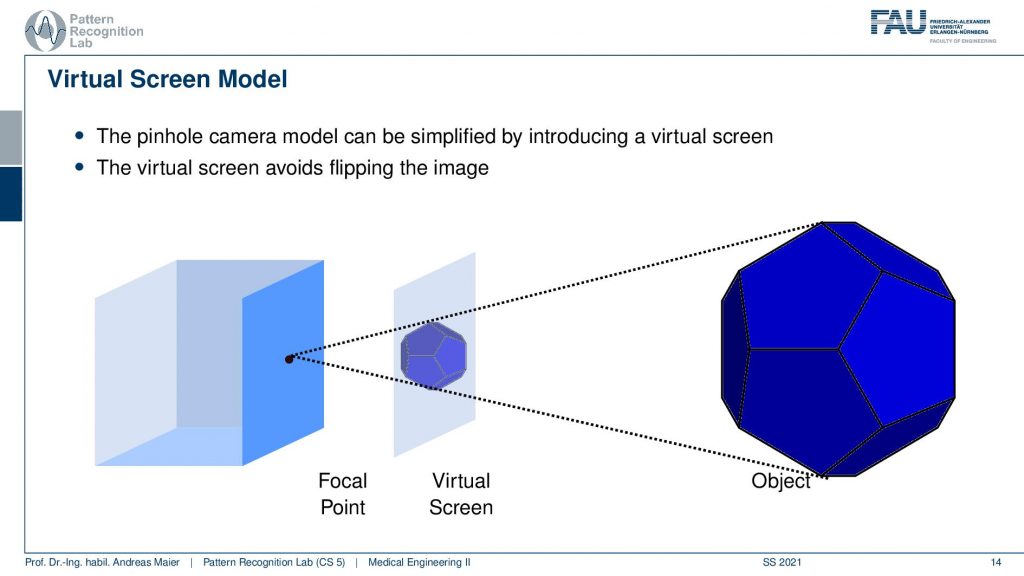
Then essentially the idea of the camera model is that you somehow have to find projections from a 3D space, the world system to your 2D projections. So what we are actually interested in is that we somehow figure out how we can find this point again here in this image. You will see that there are different methods how to model the projection procedure from here to here or from here to here. You see that this is actually a pretty interesting process. Therefore we will now introduce a couple of mathematical models in order to understand what’s actually happening here.
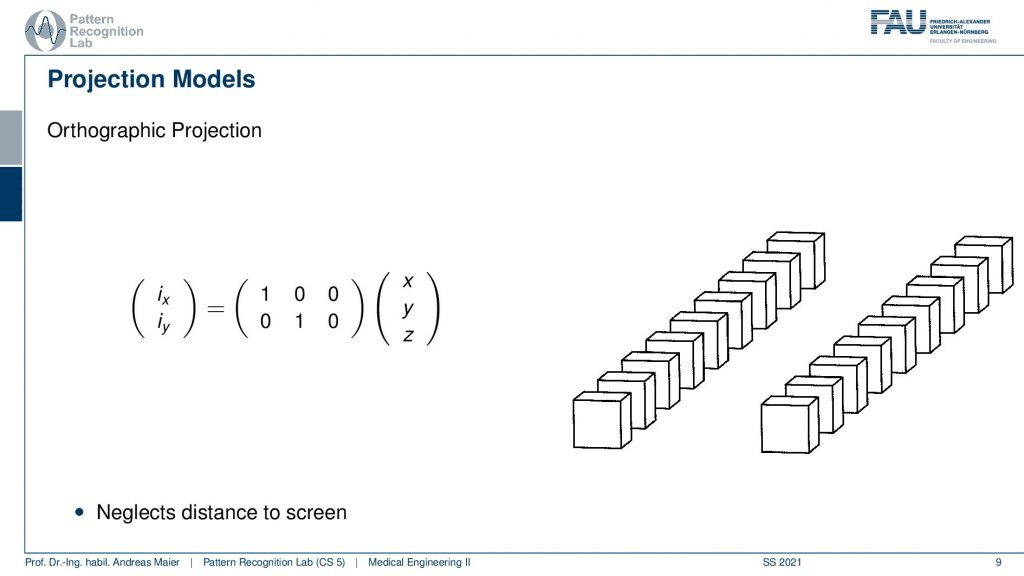
Well let’s start with the first simple approximation of what’s happening and this is the so-called Orthographic projection. Now in the orthographic projection, we actually introduce new variables. You can see here that we are talking about the projection variables that are ix and iy and then we have 3D points that are essentially encoded in x, y, and z. Now, these coordinates then have to be transformed. Here we do that with a matrix multiplication such that we can compute from a 3D world point a 2D projection point. The camera system here then is essentially found if you have the optical center here. Then you would have the image plane somewhere here. So this would be ix and iy and then you still need to have your 3D point that is exactly this x, y, and z here. What the autographic projection now does is simply neglects the set coordinate. So it does a projection that is essentially perpendicular to the plane of the imaging. So if you now project your point here you will see that you’re essentially discarding the z component. You simply get the y and the x here. So you could argue that this is a very simple technique and in particular, it cannot accommodate any scaling. Yet we would be able to write it up as the simple matrix that I denoted here. So this would be simply in the first row (1 0 0) and in the second row (0 1 0). So this simply selects in this row we’re just selecting this component here. In the second row, we’re selecting this component here. So you see that this is a fairly simple process and it can be formulated very elegantly in terms of linear algebra and matrix multiplication. Unfortunately, scaling cannot be described by this which is why we now introduce a second model and this is the so-called weak perspective projection model.
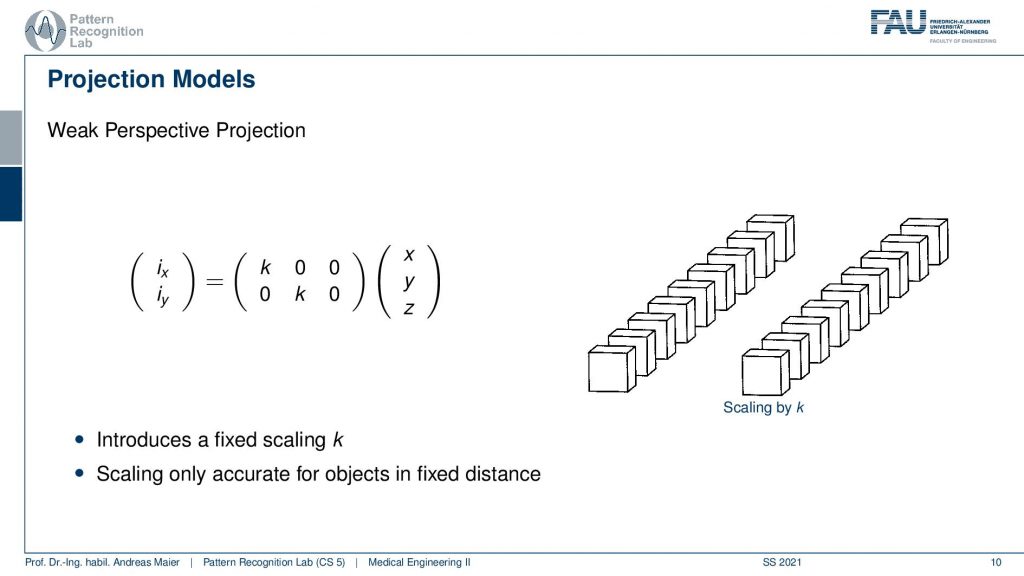
The weak perspective projection model has a couple of extensions. In particular, you can see that this is our variable k here. So k is introducing a fixed scaling. You can say that if you are now able to scale you can somehow also incorporate the distance because you can have essentially projections that magnify or demagnify. So how does this work? Well, you can think of this very similar to the previous one where you had your image plane. Now what we’re doing is we take a 3D point we are projecting it again orthogonally. So this would be a 90-degree angle and this would be a 90-degree angle. Once you projected it you get your x and your y variable. Now you can still apply some kind of scaling that is k that allows you essentially to walk across this line here and to find a new scaled version of your point. All of the points will be scaled in a similar fashion. So let’s have a look at how this behaves here in our example on the right-hand side. Now we choose one scaling of k and we can of course now choose different variants. You see I can essentially demagnify and magnify again and it is all the time an orthographic projection. So we are not changing essentially with depth but just the scaling within the plane is orthographic. This kind of helps us to understand a little bit what’s happening and we found a very simple way of writing this up as matrix multiplication. But the key issue here is that it’s not sensitive to depth. So we essentially assume that everything has the same depth and everything is scaled the same way when we are changing our k. So this is of course not true because depending on the depth from the camera to the actual object the magnification will be different. If you want to accommodate this you actually have to work with a perspective projection.
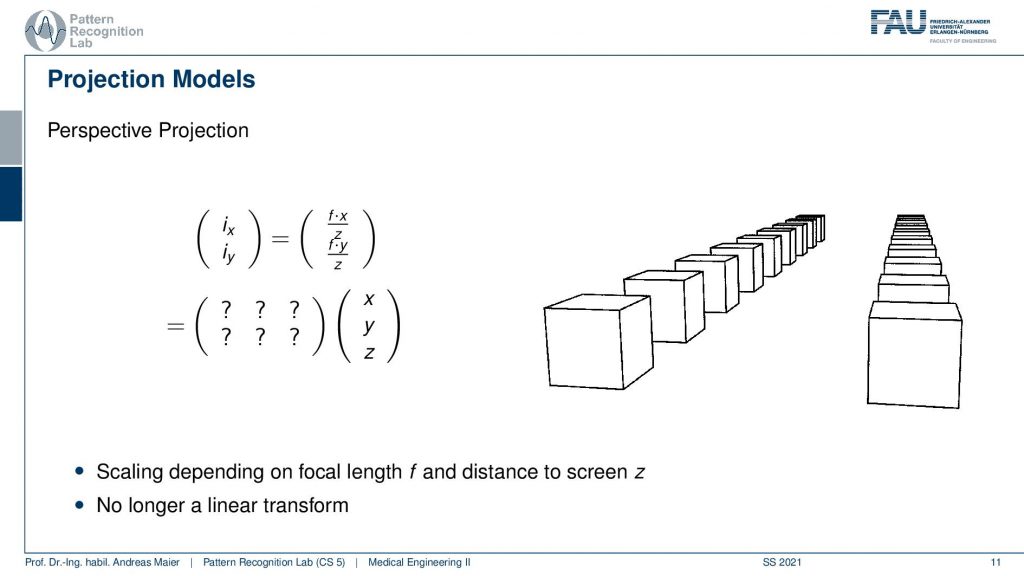
This is actually what our camera is acquiring. But you see that this is much more sophisticated in particular because we have to accommodate that we have to scale with the component z. So you do have to divide by z and this is of course something that we will not be able to write up as a matrix in this format here where we simply have six unknowns. You can try that but you will not be able to find a single matrix that would be able to describe all of the projection points. So this is a kind of challenge and if you look into our coursebook then you will see that we actually have a geek box there that gives some ideas on how we can still express this in terms of linear matrix multiplication. However, this is something that we’re not covering in the class. You will talk about these things later on if you attend classes like interventional medical image processing that will go into projection models into camera calibration and how to actually get very elegant descriptions of projective geometry.
Now we’re not doing this here but I want to show you a quick comparison of the three models that we talked about.
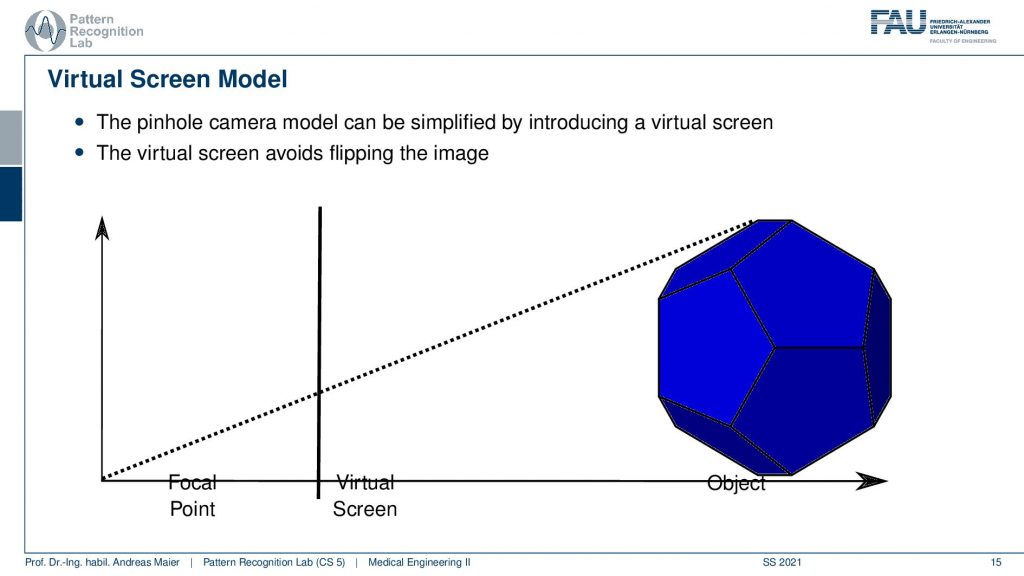
Here you can see that we essentially have again our world point and then our projection point. The imaging system that we’re purchasing here is only in 2d which essentially means that you have the set coordinate here. You have essentially one of the image coordinates here let’s say this is ix. Then you can see how we can compute the new projections onto our screen.

Let’s look into the different models and do that here. We start with the autographic projection. We have already seen that we project along the normal of our image plane and then we get a projection point like here. So this is simply the orthographic projection and we are not sensitive to depth in this model and we can’t model any scaling. Now for the weak perspective case what we do is first do the orthographic projection. Then we apply our scaling with k such that we can model a demagnification. So this is the weak perspective model. Let’s see what our projective model does? You can see we are connecting essentially the optical center with our 3D world point and we compute the intersection here which is then done by computing the coordinates here. We’ve seen already this cannot be formulated as a simple matrix multiplication like in the previous cases. But what you also see is if I choose a point that is farther away then it result in a different intersection point here. Or If I choose something that is very close I will also get a different intersection point here. So this model will be able to accommodate the depth.
Now we understood a little bit about projection geometry and projection models. The next thing that we have to do is somehow have to get the light inside of the body.
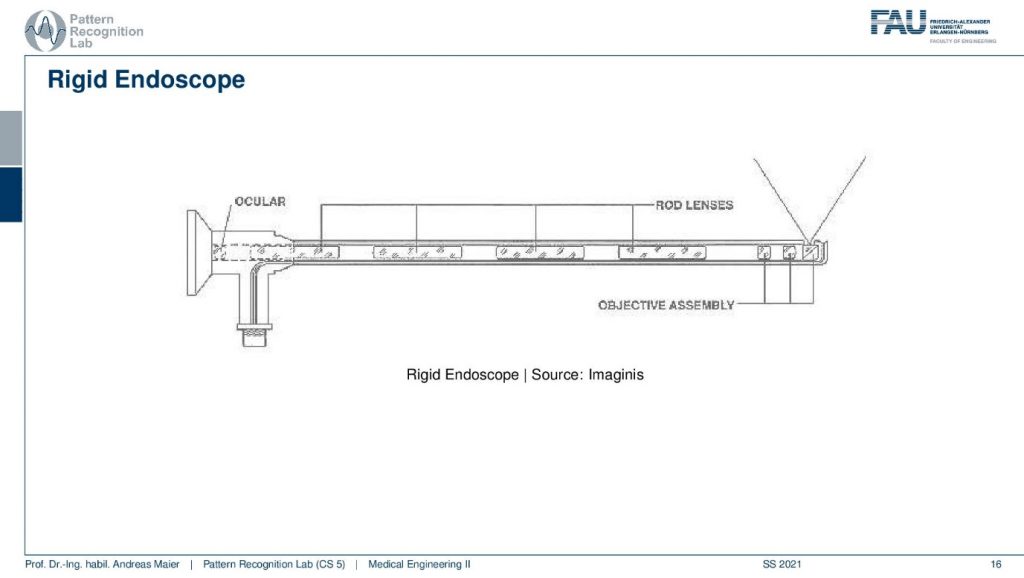
This is actually done with the hardware you see here a rigid endoscope. The key idea here is that you have a light source that is connected here travels the light in here and shines onto the scene. Then here you see a special type of endoscope that has a 90-degree angle at the tip. So you can actually look around the corner of it. There are also different kinds of endoscopes. There are also endoscopes that have the opening here but in this example, we are not considering this here. So now the light is in the scene it gets reflected and then of course it travels back. So it travels here such that it is visible at the ocular. Here you could either place your eye and look inside the endoscope or you could digitize the signal let’s say with a CCD chip. So this is already the key setup of an endoscope in order to make this work you need these rod lenses here that are able to transport the light within the endoscope optics towards the outlet where you can then place the eye or the so-called eyepiece. This is a rigid endoscope. A flexible endoscope is slightly different.
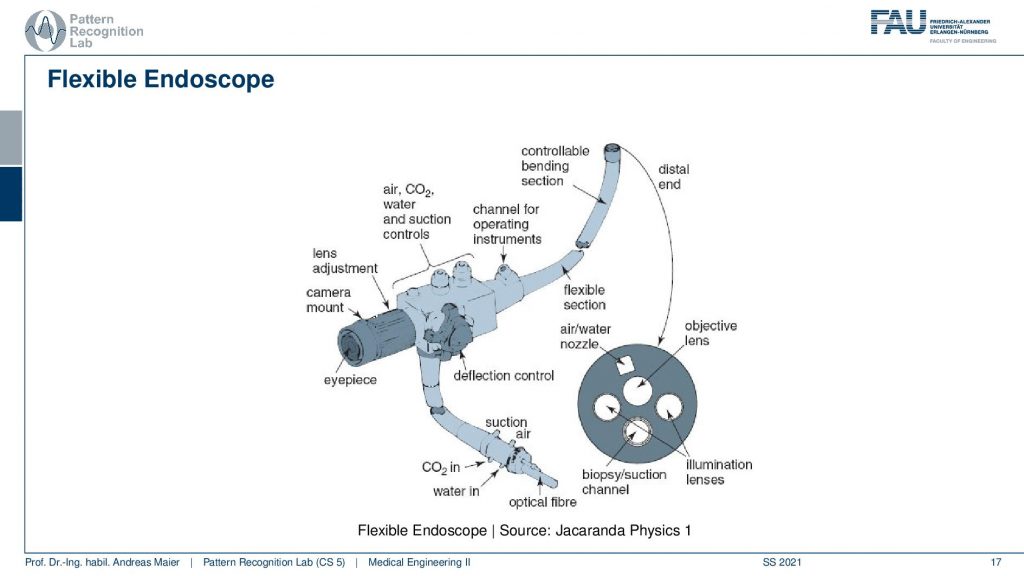
So here is a schematic of a flexible endoscope. Again you have the light source coming in here and you have an eyepiece at this position. So this is a little different because first of all the tip here this guy here can be controlled with a handle here and this controls the deflection of the tip. So the tip can be moved and you can essentially bring it up and down. So this is a very interesting kind of mechanical problem. You have the flexible fibers such that you can actually see what is on the other end and you have some optical transport that is able to be bent. What’s also interesting about this particular thing is that on the very tip here. If you look here at the distal end you see a magnification here and what you see in this magnification is that there are several channels that go through this endoscope. So you have of course illumination lenses this is where the light goes in, you have the objective lens this is where the light goes out. Then you have different nozzles that can transport air or water for example to clean the area that you want to see. Then there is also a channel here that is able to transport tools. So you can perform a biopsy with such a flexible endoscope and you go through this channel and then you can transport a tool there in order to take out cut out some tissue. So this is a very interesting device and we will see that this will have numerous applications within different surgeries.
Well now we kind of understood how the endoscopes look like but we still somehow have to enter the body. This is done with so-called trocars.
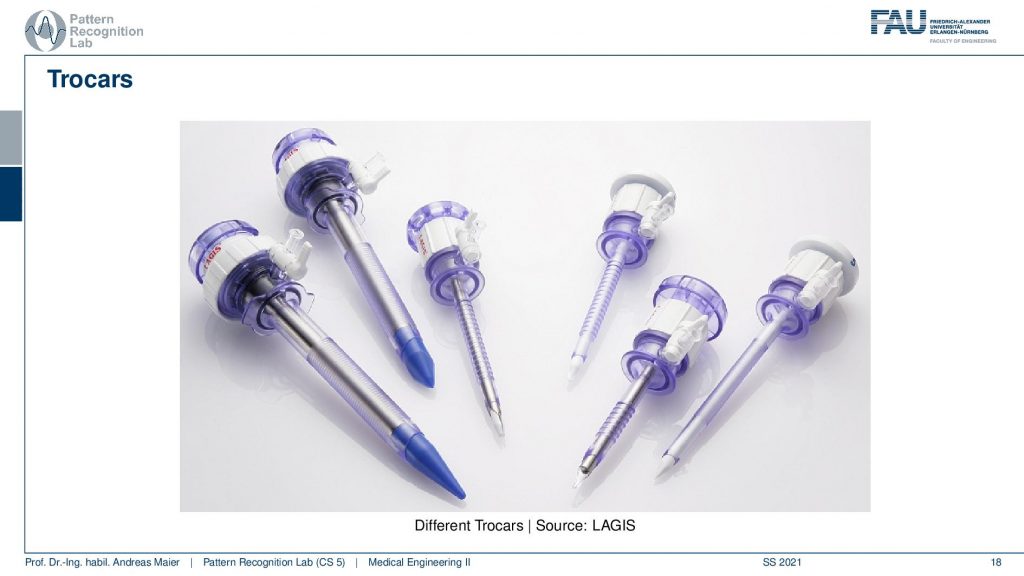
So trocars are essentially gates that you can implant and there you can then insert the endoscopes into the body. You can see they are pretty sharp during the surgery they get implanted. They are only there of course temporary but this allows you to plug in the endoscope to plug in other tools take them out safely again. So this is a kind of valve that you can use to bring things into the body and take them out again. So this is very important for the surgery because you have to be able to access the site of intervention and of course you also want to be able to exchange and swap the tools. So this is why you need the truckers and speaking of which of course you need tools.

So here I have a small gallery of different tools. You can see there are different gripples, there are hooks, drills, devices to cut, and all kinds of tools that have been developed for specialized minimally invasive surgery. So you can see that for every specific purpose there’s a specific tool that is being developed in order to aid in the intervention. Of course depending on what you want to do you need different tools. So this is maybe a little more sophisticated than your home improvement power toolbox. Still, it kind of resembles it a little bit at least.
Okay so now that we discussed all the technology at least the basic ones.
We have now seen the camera optics. We have seen how to get the light inside the body how the actual imaging is done. We’ve also seen the tools that we can use. So we can now have a look at an intervention. So what is done during an intervention? Well, there are of course lots of advantages for these interventions.
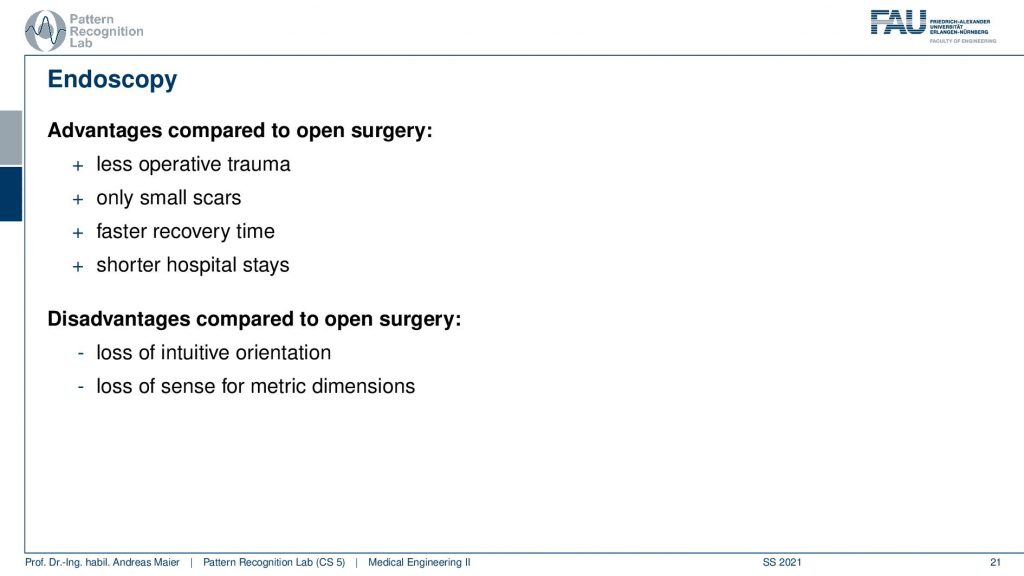
So you have less operative trauma you have only very small scars you have a relatively fast recovery time. So after two to three days, you can already leave the hospital because it’s only very small incisions. This means then that the patient recovers of course much faster. But also you have much shorter hospital stays. So this is also a huge reduction in cost. As you can reduce the cost you know you have to have people that care for the patient and so on and if you bring down the stay in hospital from let’s say six weeks to two days then you saved a lot of money. This money can of course be invested or spent for building technology like endoscopes and to make them safer and of course, improve the patient benefit such that the time that is safe there can be spent on other ideas to improve generally the treatment. It also comes at a couple of disadvantages in comparison to open surgery it’s much less intuitive to orient. So if you’re right in front of the patient and you cut them open you see where everything is. So navigation is very easy. Imagine looking into the patient through a keyhole and then all the tools go through these tiny holes, navigation is much much more difficult. Also, the camera orientation will change depending on how you’re actually twisting the tool. So this is slightly less intuitive. Also, it is close to impossible to measure anything inside the body because you have perspective distortion, and depending on how far you’re away the magnification will be different. So there are no metric measurements. You can’t say how many millimeters you’re actually moving ahead and so on if you look into this endoscope optics. So this is also a huge disadvantage. Still, it is very popular for various interventions.
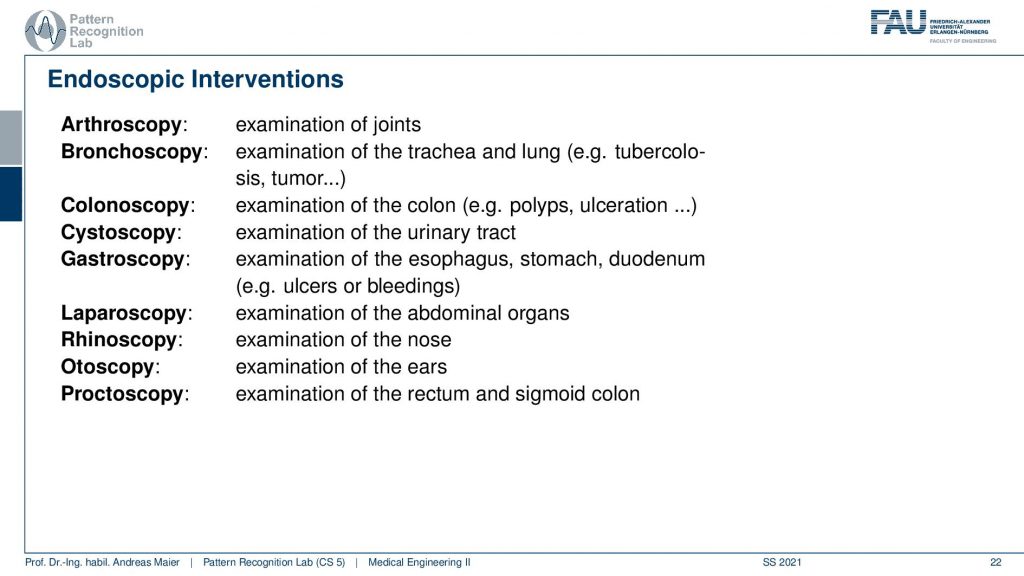
So here you see examples ranging from Arthroscopy where you examine the joints, Bronchoscopy we are examining the trachea and the lung, Colonoscopy where you go into the colon and to investigate polyps and ulcers and things like that, in cystoscopy you examine the urinary tract and gastroscopy you are examining the esophagus, the stomach, and the duodenum. For example also for spotting ulcers or essentially assessing the development of potential cancer and things like that. There’s Laparoscopy where you then directly access the belly in the abdominal organs. So this involves a couple of cuts. Rhinoscopy where you examine the nose and this is typically done with flexible endoscopes, Autoscopy where you examine the ears and Proctoscopy well this is of course also something where you can plan and treat patients.
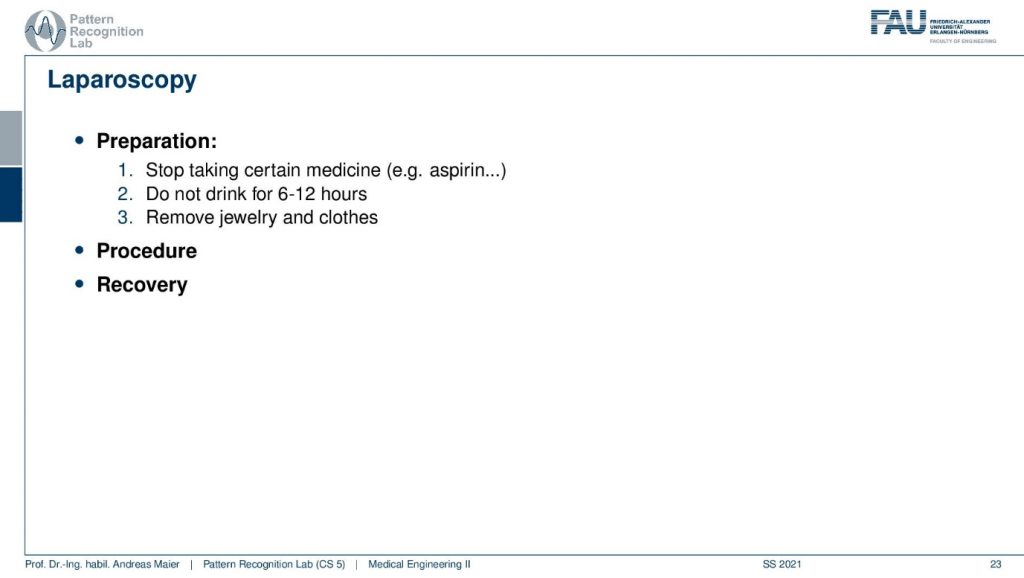
So let’s look into an example. The example I want to show today is Laparoscopy. In Laparoscopy you first have to prepare the patient and the first step is that the patient has to stop taking certain medicines. For example, aspirin is a blood thinner so you want not the patient to be on aspirin during the intervention. Just in case anything goes wrong and there’s a major surgery then you don’t want the patient in a state that he or she would bleed very easily. Also, the patient must not drink for six to 12 hours prior to the intervention. Of course, you have to remove all the jewelry, clothes and then you lie down on a bed and you get transferred to the operation theatre.
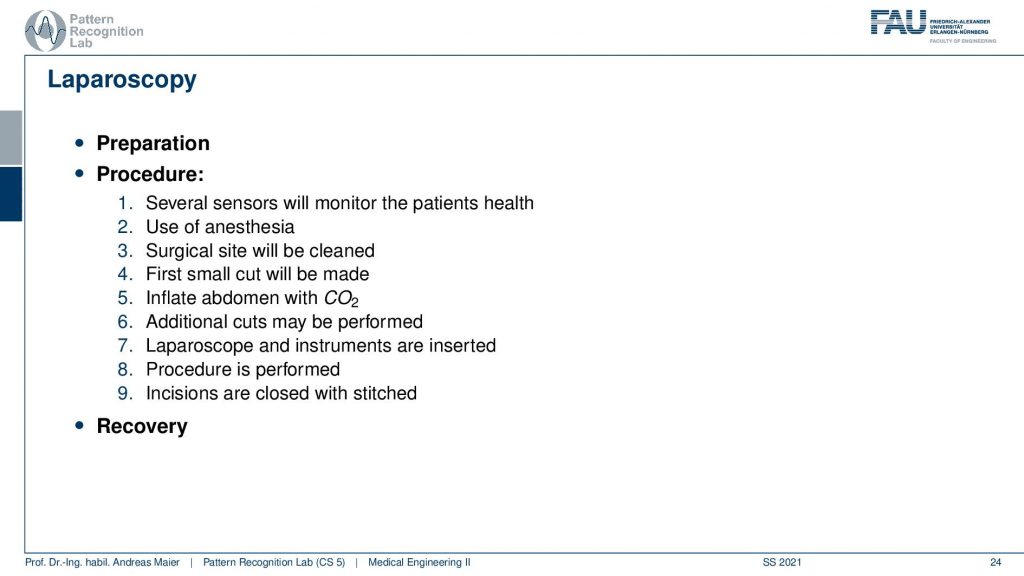
Now in the procedure, the first thing that happens is that several sensors are placed on the patient. This is of course done to monitor the patient’s health. Then the patient undergoes general anesthesia and of course, the patient will sleep during the entire intervention such that he does not recognize anything of the incisions and all the tools that are brought into his body. Next, the surgical sites are clean. So in most cases, laparoscopy will have three cuts. One cut is placed in the belly button and the other ones are placed slightly beside that. So after the intervention, you’re likely to have something like close to three belly buttons. There will of course be scars after that. So I can really tell you that laparoscopy is kind of leaving scars and therefore it is also an additional burden to our patient. Sometimes patients would like to prevent those scars. So this is a clear disadvantage. Then the first small cuts are being made you then inflate the entire abdomen with CO2. So you blow up the belly in such that you have some space in order to move around. Then you might have to perform some additional cuts. Then the laparoscope and the instruments are inserted. Then the procedure is performed. One typical procedure is the removal of the gallbladder. So there you go in, you find the site where the gallbladder is then you carefully cut out the gallbladder take it out through the instrument channel and then you can go ahead sometimes you also have to make small sutures. So you really have to sew something inside of the body. So that’s also something where you need tremendous skill so have really really great respect for all surgeons and of course also for all minimally invasive surgeons. This is a kind of task that requires a large amount of skill. Then after the procedure is done the incisions are closed and they are stitched. So the stitching on the outside is of course a little bit easier. Then the patient goes towards recovery. This is really interesting because if you had such an intervention then your stomach really hurts you have a lot of painkillers, you can barely move then very often you actually have a catheter inserted in order not to use the restroom. Because you can very barely move on the first couple of hours. You think okay this will be terrible and will take you weeks to recover. But actually, only after approximately 24 hours you can already start walking, you can go to the restroom, still, a couple of meters from the patient bed to the restroom are super tiring. So you think okay this is gonna be really bad and after another 24 hours then you have already recovered you can almost walk normally and the next day you can already leave the hospital and return to regular work. Of course, you want to avoid sports heavy lifting and so on for the next at least 12 weeks. Because otherwise the incisions inside of your body may just rupture and then you would have severe internal bleeding and you don’t want to have that. So you have to be careful the next 12 weeks but approximately after three days, you feel that well again that you can already just go back to your regular routine if you have an office job for example.
So this already brings us to the end of this first video. So we discussed in this video the basics of endoscopy. We had the camera models that we have been using in order to understand how the imaging is done. We looked a bit into the hardware how a flexible and rigid endoscope actually looks like and the kind of rod lenses that you need and the flexible endoscope has these working channels and so on. So these are really wonderful devices engineered really at excellence and furthermore, you need additional tools that have to be inserted you need the trocars in order to be able to access the patient operation areas. Once you have all of that in place you can then go ahead and perform the first minimally invasive surgeries. So in the second part, we want to look into future technologies and some recent developments in endoscopy and see how they can bring potential benefit in the future. So I hope you liked this little video and I’m very much looking forward to seeing you in the next one. Bye-bye!
If you liked this post, you can find more essays here, more educational material on Machine Learning here, or have a look at our Deep Learning Lecture. I would also appreciate a follow on YouTube, Twitter, Facebook, or LinkedIn in case you want to be informed about more essays, videos, and research in the future. This article is released under the Creative Commons 4.0 Attribution License and can be reprinted and modified if referenced. If you are interested in generating transcripts from video lectures try AutoBlog
References
- Maier, A., Steidl, S., Christlein, V., Hornegger, J. Medical Imaging Systems – An Introductory Guide, Springer, Cham, 2018, ISBN 978-3-319-96520-8, Open Access at Springer Link
Video References
- Capsule Endoscopy: a helping hand https://youtu.be/ubGltGl3gY0
- Endoscope Camera System HD3 Clinical Video https://youtu.be/aGkgDrMF8f8